
Materials Used
We used several products and supplies in the making of our ice cream gift box. Below is a list of what we used.
- Summer Gift Box, Gift Card Holder, and Greeting Card Set – Digital Download SVG
- Recollections cardstock
- I Kan’Dee Chalk Set-Pearlescent Jewel Tones
- Glitter Tinsel Pom Poms
- Art Glitter Glue
- Electric Cutting Machine: Cricut or Silhouette
***Note that this post contains affiliate links and we may receive compensation if you buy something using one of our links. ***
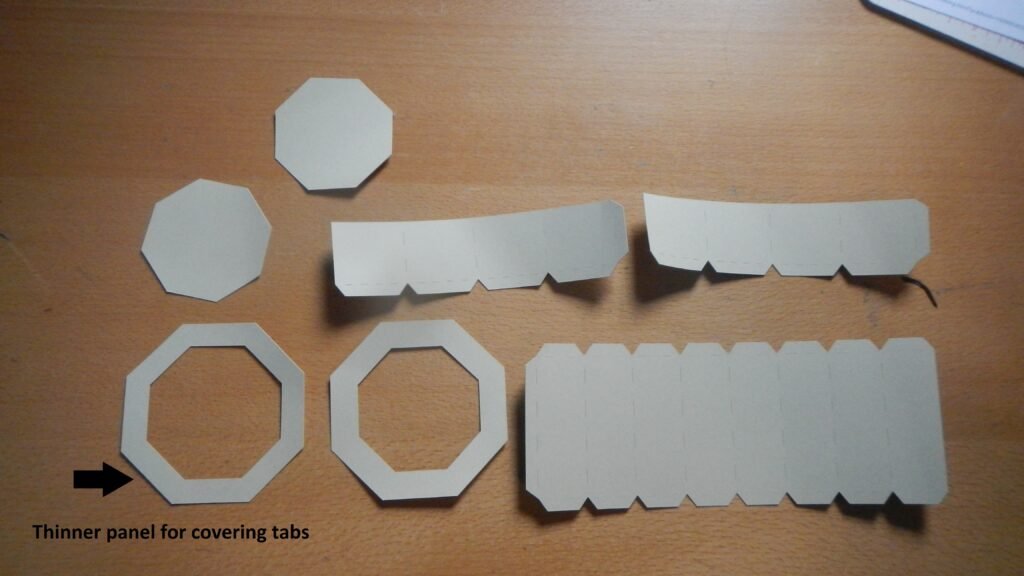
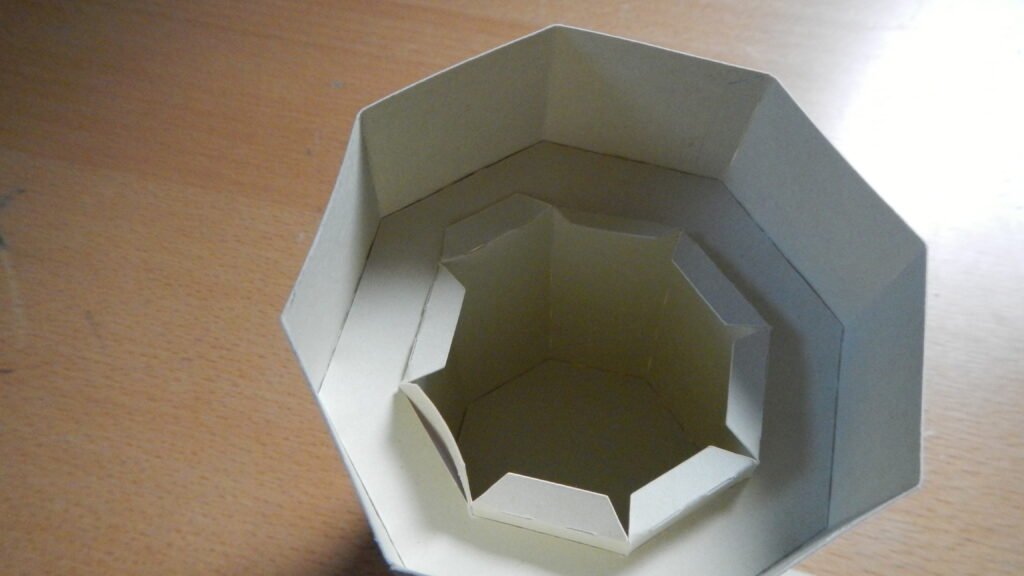
Ice Cream Cone Pieces
Below is a photo of all the cone pieces. The tallest piece is the part of the cone you’d hold onto. The solid octagons are the liner for the inside of the cone and the panel for the outside, bottom. Both are the same size so no need to keep track of which is which. The octagons with the hole in the middle are a little different. One is used to help make the shape of the larger part of the cone and the other (marked with an arrow and narrower) is used on the outside to cover the tabs holding the box together.
Ice Cream Cone Assembly
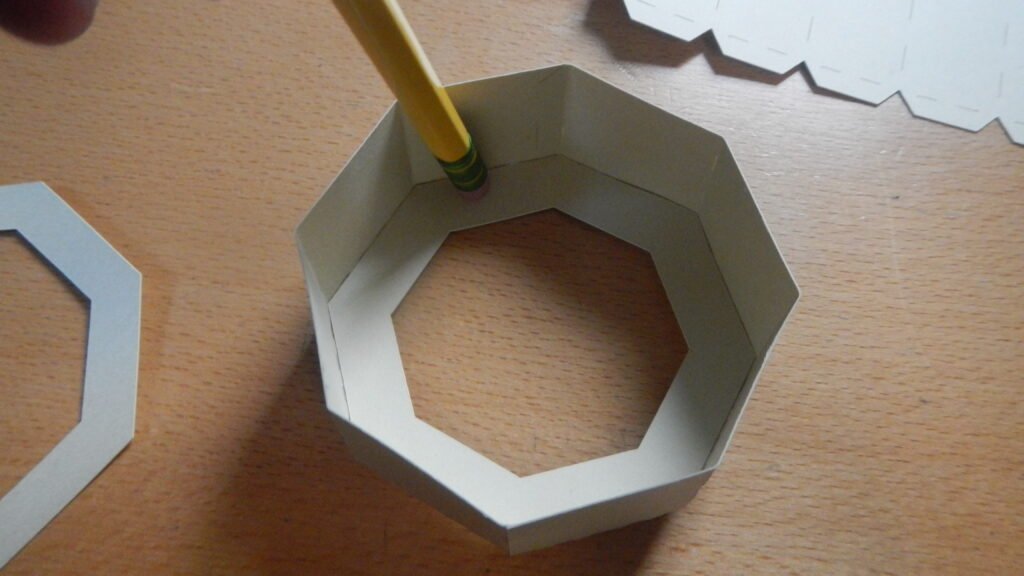
First we took the two pieces that make up the top of the ice cream cone and glued them together. This makes an octagon shape. Then we folded in the tabs, added glue and put the liner on the inside (make sure to grab the thicker one).
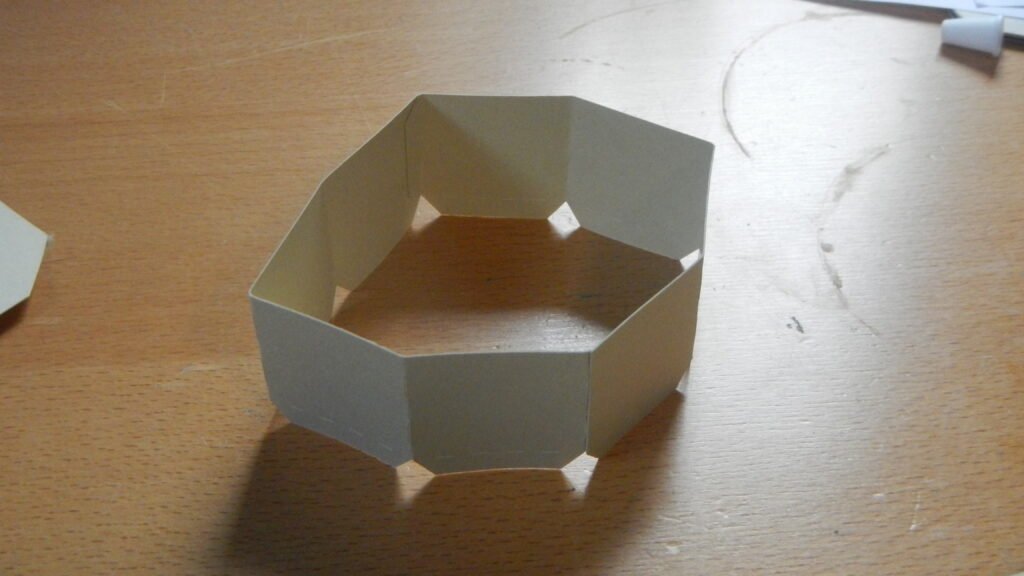
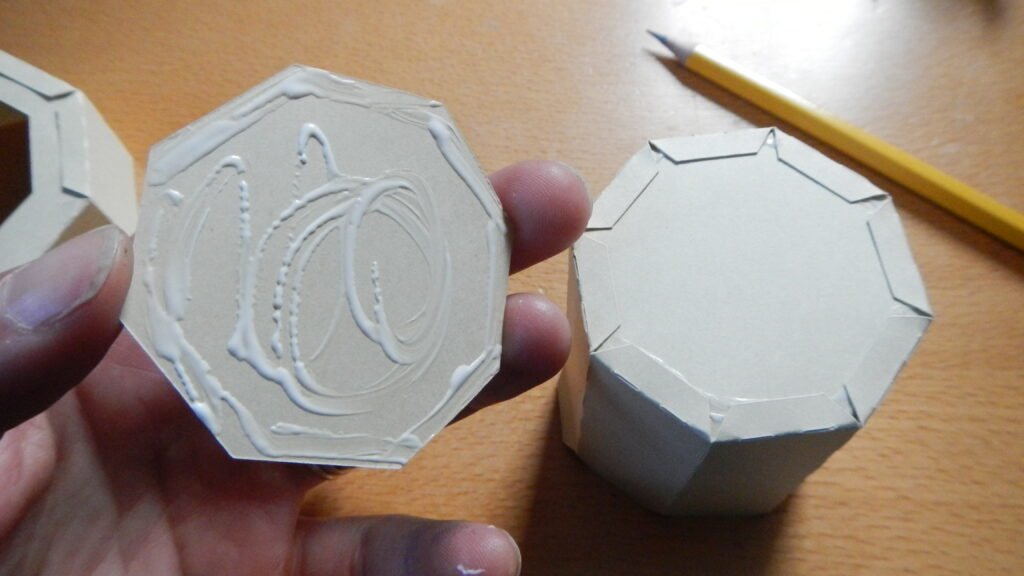
Next, we took the tall piece that makes the handle of the cone. We applied glue to the long tab and made a long octagon shape. Then we folded in the tabs, added glue, and pushed the liner down to close the bottom of the box. Once done, we turned the piece over and added glue to the other bottom panel and placed it over the exposed tabs.
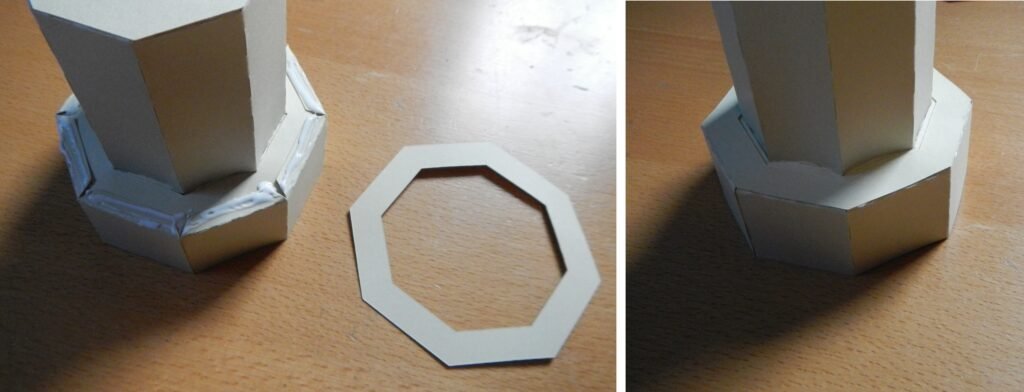
To attach the top of the cone to the bottom/handle of the cone, we folded all of the tabs up or in a little. Then we slid the top over the handle and down a bit. Place some glue on the tabs then fold them out and slide the ring up so that you can make contact and secure the tabs to the octagon ring.
Once the top is attached to the handle, turn the box over and add the thing octogen ring to cover the tabs. Here you can see we chose to put glue on the tabs themselves then slide the liner down. We decided not to put glue on the liner as we were worried we’d smear glue all along the handle!
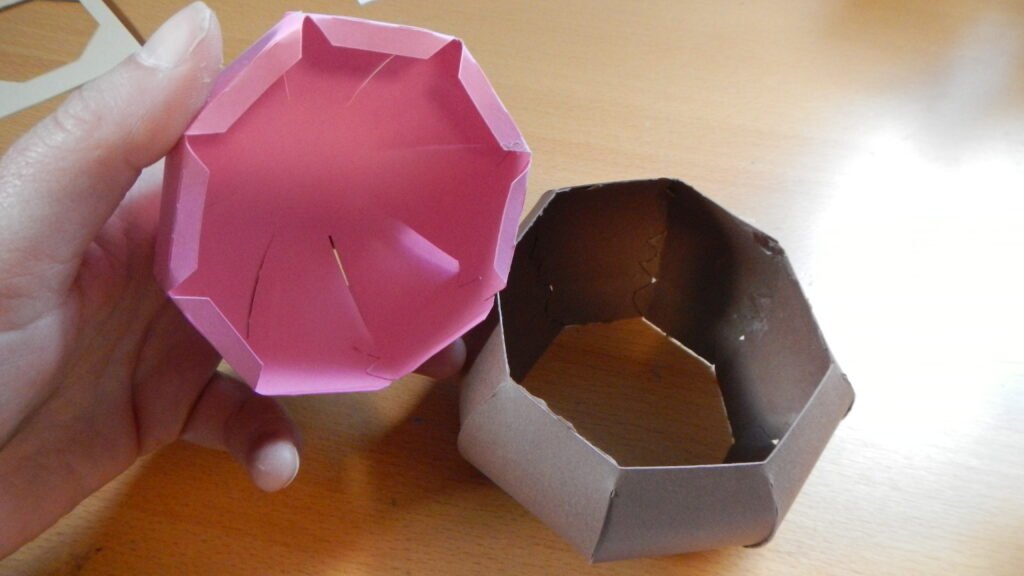
Making Scoops of Ice Cream
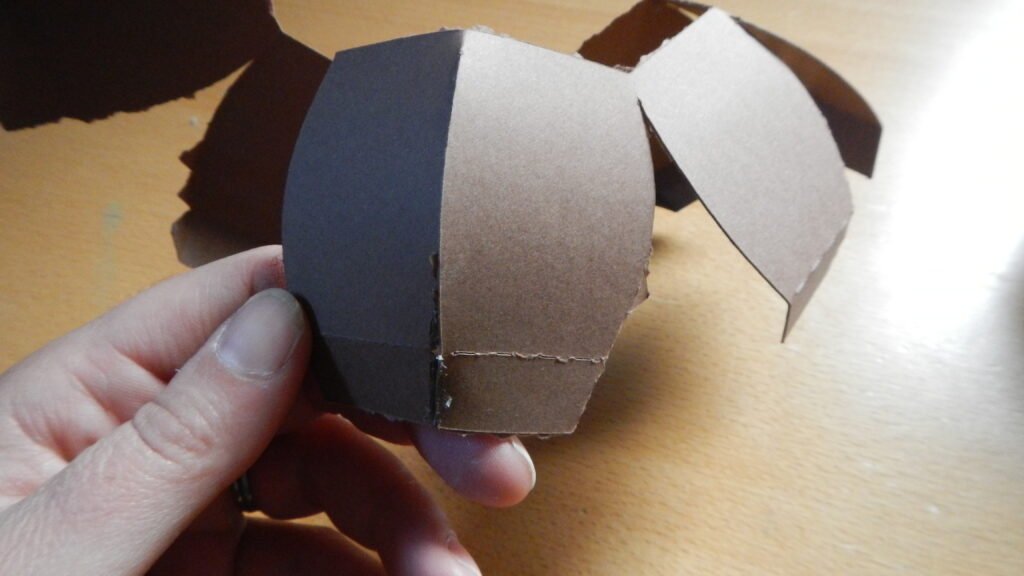
The bottom scoop (pictured here in as chocolate) is pretty straight forward. We found it easiest to glue the tabs making the rounded portion of the scoop first, then going back to glue the tabs connecting the pieces that inset, giving it something to sit on in the cone.
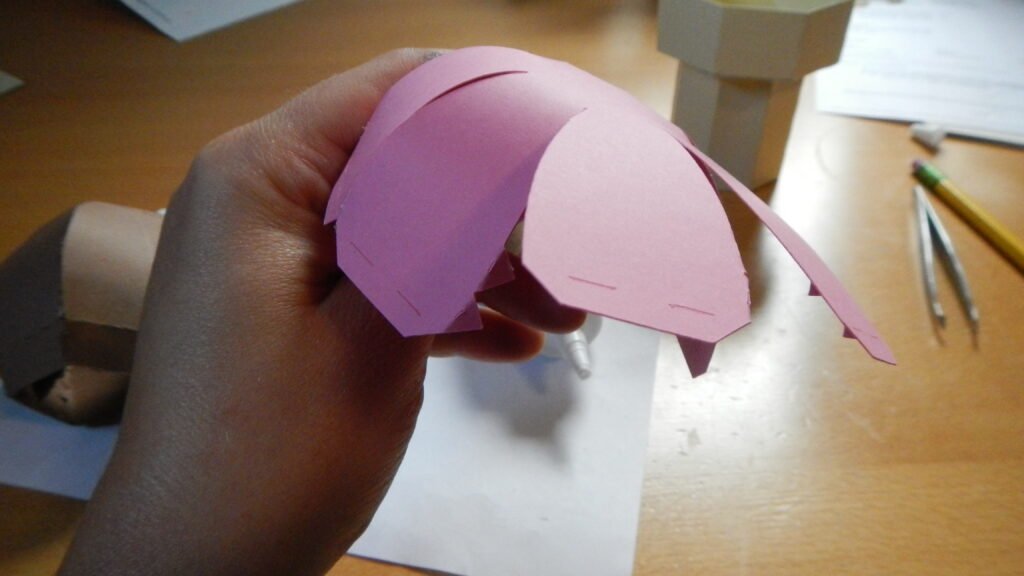
The top scoop (pictured here as strawberry) is similar in construction. Just glue the tabs to the neighboring piece, encouraging it to make a rounded shape. If your paper isn’t cooperating then you can use a pencil or something else round to try training the paper first. The tabs at the bottom of this scoop are meant to glue it to the other ice cream scoop.
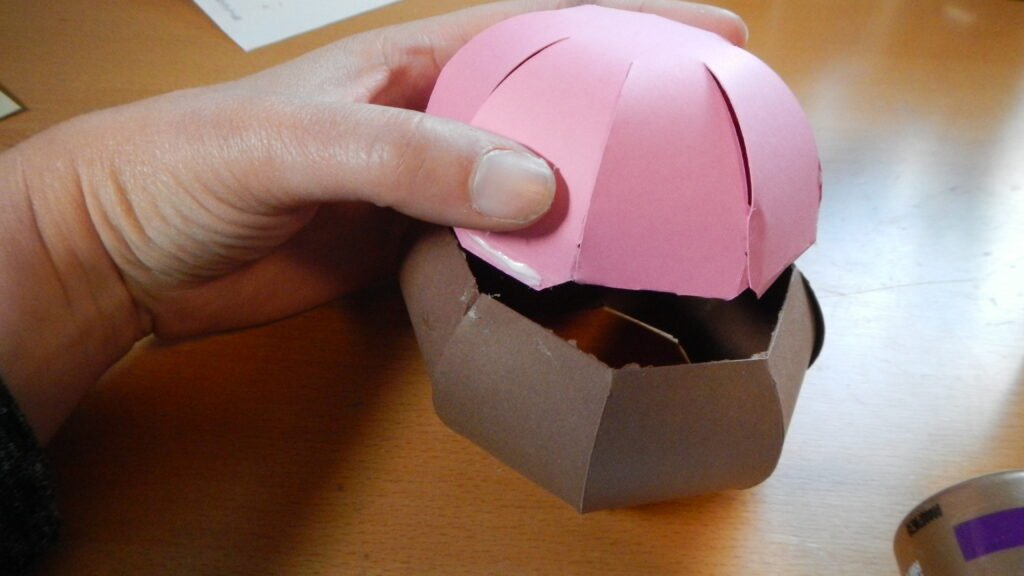
Here they are getting glued together. Start on one side then move to the opposite side. After that move around and glue different ones until they are all in place.
Leave a Reply