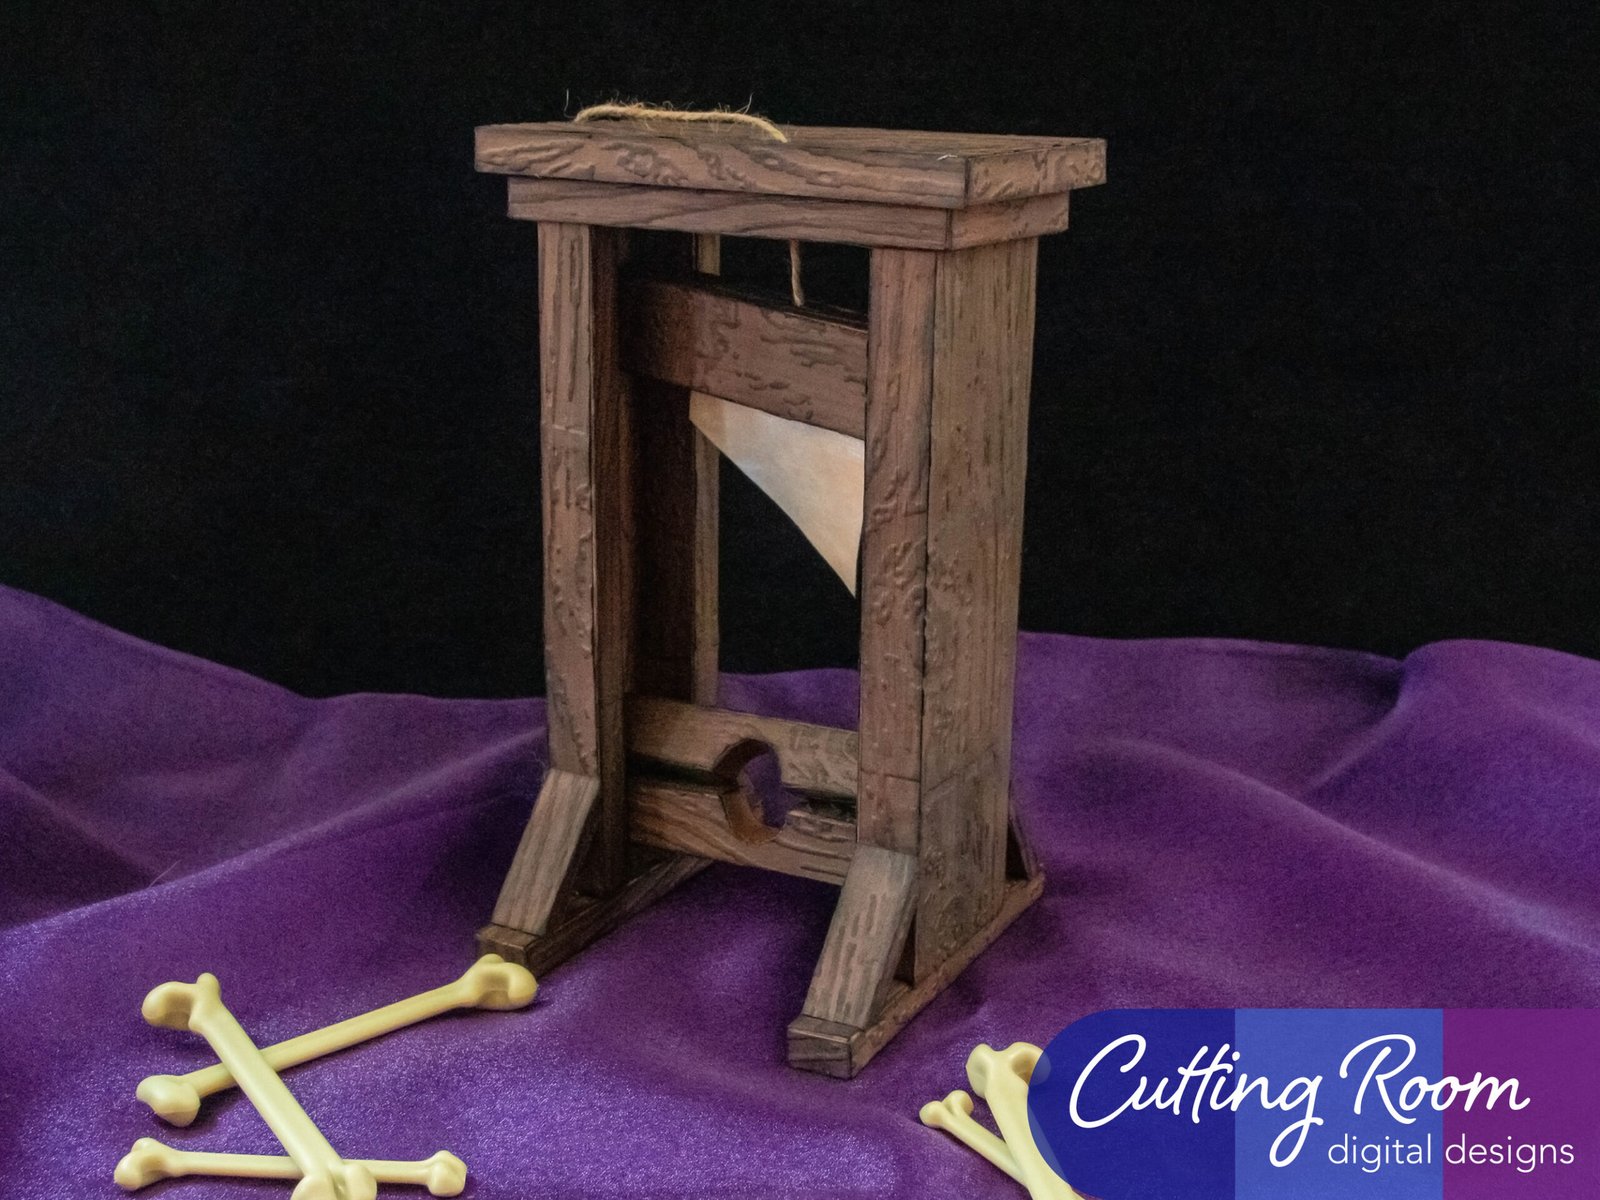
Materials Used
We used several products and supplies in the making of our guillotine Halloween decoration. Below is a list of what we used.
- Guillotine 3D Papercraft Halloween Decoration – Digital Download SVG
- Recollections cardstock
- Brads
- Recollections Foil Cardstock
- Art Glitter Glue
- Hot Glue
- Royal Brites White Foam Board
- Wood Grain Embossing Folder
- Color Petal Ink Pad – Black
- Tim Holtz Distress Ink – Rusty Hinge
- Tim Holtz Distress Ink – Ground Espresso
- Tim Holtz Distress Stain – Brushed Pewter
- Hampton Ink Pad – Dark Green
- Jute Twine String
- Electric Cutting Machine: Cricut or Silhouette
***Note that this post contains affiliate links and we may receive compensation if you buy something using one of our links. ***
A Note About Assembly
The guillotine is made of many pieces that need to be assembled. However, none of the pieces themselves are that hard to assemble. The largest challenge here is staying organized. We chose to spend some time embellishing the paper before assembling it to give it a look that we wanted. This isn’t required but we though it added a nice touch. A printed distressed wood paper would give a similar affect if preferred.
To get the paper to look like old wood, we started with 65lb cardstock in a medium to dark brown. Using a piece of sandpaper, we sanded our panels a little to add some subtle texture. This will show a little later once inked. Then, we used Tim Holtz Distress Ink in Ground Espresso. We diluted with a little water on our desk and rubbed it onto the paper. Once that was dry, we took Hampton Art ink in a very dark green and repeated the process. After letting the paper dry again, we ran it through our embossing machine with a Tim Holtz wood grain die. We then added some ColorBox black ink to the raised portions.
Once the decorative pieces were placed on each component we followed with black ink to the corners and edges. You don’t need to do any of this or if you have another process or idea then that works too. We just thought we’d share our process if it helped give inspiration for your own project.

Now for the different components to assemble. The order you do this in doesn’t really matter, so go ahead and start wherever. Below are directions on how to assemble each piece.
Guillotine Top 1
This is assembled by folding along all the fold lines on the large box component. Then add glue to the long tab at the end and fold around to create a large rectangular box. Once this tab is secure, you can fold in the tabs on the end and glue them in place before moving to the other end. Now you should have a completed, enclosed rectangular box with a whole through the center. This hole is for the rope to go through later and support the blade.


Once this was assembled, we added the decorative panels to the sides and the large one to what will be the top of the guillotine. There’s only one large decorative panel, leaving the bottom smooth so the next component can attach without interference from decorated or distressed paper. The bottom won’t be visible so there’s no need for a decorative panel, but if you wanted, you could cut the large one for the top a second time to use on the bottom.


Guillotine Top 2
The second top goes together the same as the first. The only difference being it’s a little smaller and there are only decorative panels for the narrow sides, not the large sides with the holes in the center.


You can set these two tops to the side. They will be glued together later.
Guillotine Blade and Support
The next part we put together was the board that has the blade on it. This is first done by taking the long panel with tabs and folding along all the tabs. Then add glue to the tab at the end and fold around to create a box shape.


Once this is secure, fold the tabs on one side in (either side is fine) and add glue then place the solid rectangle panel in to close off the bottom of this box.


Next we took a piece of baking twine and cut it to be about 2 feet long. This gave us some extra at the end to cut to the length we wanted but we only cut off a couple inches in the end. Take the decorative panel with a round hole in the center, run the twine through, then tie a knot. Using hot glue, attach the rope to the inside of the panel.


Put glue on the tabs on the open side of the box and attach the panel with the wine. The knot and any lump caused by the rope should be able to fit between the tabs so you can get a solid attachment of the decorative panel to the tabs.


Making The Blade
Our next step was to put together the blade. We had to experiment with this though I think there’s probably better ideas out there. We used white 65lb cardstock, added some Tim Holtz Distress stain in pewter, lightly sanded once dry, then added a little Tim Holtz Distress ink in Rusty Hinge.

After allowing this to dry, we folded along the score lines at the top and glued the pieces back to back, leaving two tabs at the top to use for attaching to the decorative panel with a long slit in the middle.


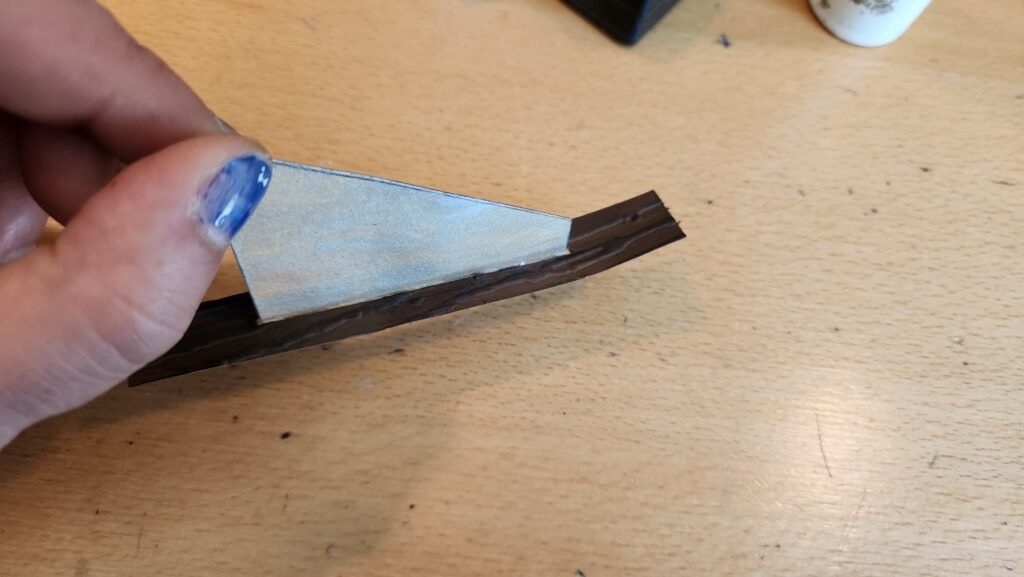

Put glue on the back of this assembly and attach to cover the exposed tabs on your blade support. You can add the two larger decorative panels to the sides now as well.


You can set this piece aside while the next component is assembled.
Top and Bottom Cross Brace
These are assembled the same, the difference between the two is the top one is a little smaller, giving it enough space to be moved and the top one also has some box like braces on the back to help keep it upright.
To start the assembly, there are three base panels that are put together. Start by folding on all the score lines, then take the long narrow piece and attach it as shown. We chose to only attach on the two long solid tabs first, leaving the part that will curve free. Once the two tabs are secure, we added glue to the many triangle tabs that are on the curve and attached them to the long narrow panel.


We then took the other panel and attached it to the curved portion using the same technique of starting with the long panels then adding the shorter smaller triangle ones on the curve. When this is secure, you can add glue to the one long remaining panel and finish making the box shape. Then fold in the tabs on the end and secure to close of the box entirely.


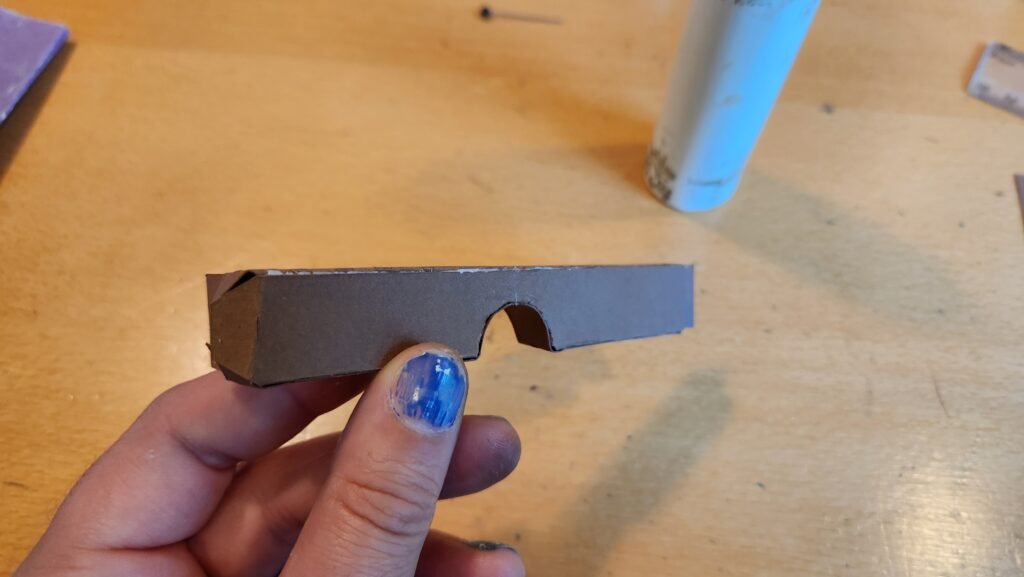


You can now add the decorative panels. For the bottom cross brace, there are 2 with the curved cut outs, one long one, and two short decorative panels for either side of the arch. There are no panels for the ends as these will be glued to the guillotine later.


The top brace is a little different in that one of the larger panels (with the half circle cut out) is shorter. This is because there will be supports glued to the ends. We’ll do that in a moment, first just attach the decorative panels to the top brace.


Spacers For Cross Braces
Next we assembled the two boxes that will be placed on either end of this top brace. They are one piece, just fold on all the score lines, and glue the tab to make a square shape, then fold in the tabs on the ends and glue to close off the ends. You’ll note that there is a small cut line in the middle of two of the panels (we added some white pen to them in the photos so they could be better seen here), these are used to orient the box when you attach it to the cross brace. Add glue to one of the panels with a mark and glue that side to the end of the cross brace. Once this is secure, you can use the rectangle panel to run from the end of the cross brace and onto the box, adding extra support.


Guillotine Bottom Boards
There are two of these, one for either side of the guillotine base. They are assembled but folding along the score lines then adding glue to the long tab and attaching to make a long rectangular shape. Once this is set, you can fold in the end tabs and glue them so it’s closed on either end. You’ll notice that we have highlighted in white the little score lines in the decorative panels. These are to help guide placement later so marking them in some way if you are going to distress and ink your decorative panels is advisable. It’ll make them easier to find later and the area where the line will be will be obscured so the mark you make should disappear from view. You can place all the decorative panels on this piece, repeat to make the second one, then set them both aside.


Bottom Braces
There are four of these and each has a decorative panel that goes on it. We however, found it best to assemble the braces and wait to put the decorative panel on once the brace is in place on the guillotine. To assemble the brace, fold along all the score lines, then add glue to one set of small tabs and the two long tabs, then fold the long flap up to snuggly attach these. Once they are attached, you can add glue to the rest of the tabs and position the flap to close the shape.


You can set these aside with their decorative panels
Side Supports
There are three side supports and only two sides, so what’s the deal? Well, one of the sides has two holes in it, to cover the holes and protect the backside of the brads, you’ll want to put your brads in place, a little loose so you have space to wrap your twine around them later, then glue one of the solid panels to the back. We recommend having all three of these panels distressed and decorated or cut in your patterned paper if you are using any. These panels can be seen both front and back when you are looking at the guillotine from an angle.


Support Pillars
I know we haven’t done these yet but we are going to do them after we’ve started some assembly. We’ll get to them soon. We just found it easier to save these for putting straight into the assembly once done.
Guillotine Assembly
Finally, after all that we get to start assembling the guillotine! Whew, made it through the hardest part!
To start, take your assembled Top 1 and Top 2. Add glue to one side of Top 2 and attach it to the undecorated side oft Top 1, making sure that the holes are lined up.


Guillotine Support Assembly
Now we’ll assemble the Guillotine Supports. These go together the same as all the other boxes, fold on the score lines and add glue to the long tab to create a long box shape. The difference with these is you want to only close up one end. The other end needs to stay open.


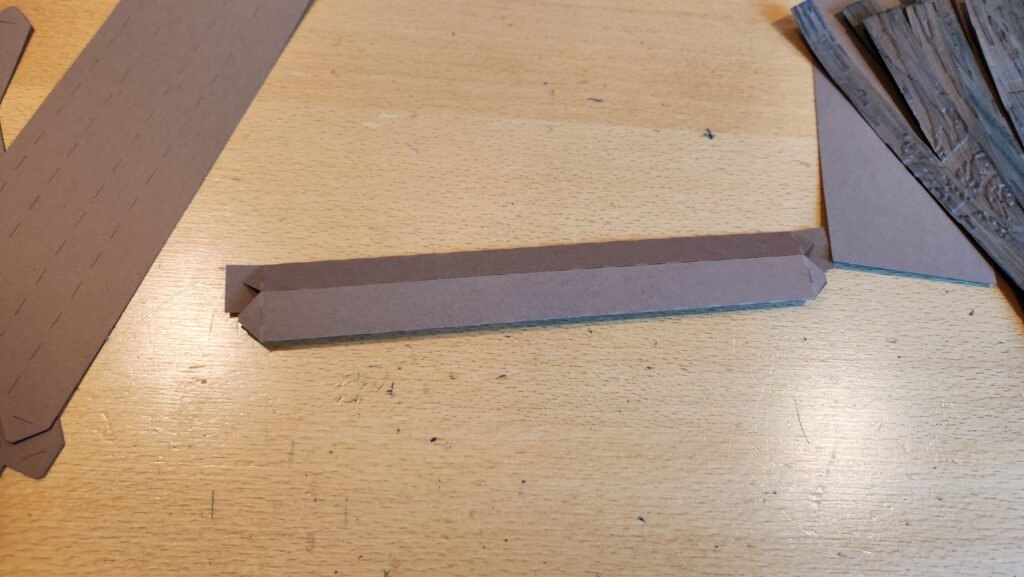


Next, take the flat rectangle panel missing the corners (included with Guillotine Top2) and lay it on the table. This is what the tabs at the ends of the supports will be attached to. You’ll add glue to two of the triangle shaped tabs and slide them under this flat panel. Repeat until all four supports are attached.


Once all four are secure, the whole thing is kind of weird and wobbly. It’s okay, but that’s why these weren’t done sooner. Add glue to the length of the supports facing away from one of the shorter sides. This is where you’ll place the side supports. Do this for both sides. You’ll note that while doing this, the side supports might come out being a little bit longer than the supports themselves. This is okay, and actually preferred, it’ll help with alignment and stability later. While attaching the side supports, you can decide, do you want the brads to be closer to the top of the structure or the bottom. Either way works, we’ve done both in our tests of this file and like it both ways.


Adding The Top Pieces
Turn the whole thing over, fold in the remaining tabs, and add glue. Then secure to the stacked top pieces, making sure to again have the holes lined up.


Now you can start adding the decorative panels, one on each of the exposed, undecorated sides.

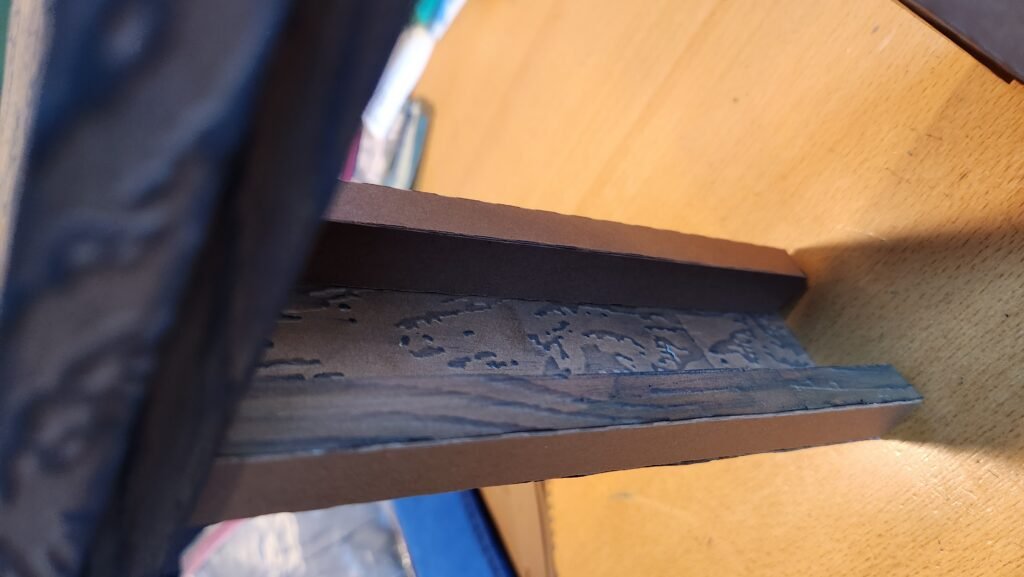
Installing The Blade And Restraint Boards
Our next step was to add the blade. Run the end of the rope through the hole in the guillotine, starting from the inside going up. Draw the blade all the way to the top and tie off the rope to the side of the guillotine, so the blade will stay high up and out of the way. You can retie this later to position it to fit the look you want later, for now it just needs to be out of the way.


Take your bottom cross brace and with your guillotine still upside down, and add glue to the ends of the brace and a little on one side. You can chose how high you want this to be up, there’s no right or wrong, we chose to put it about a finger’s width up from the bottom of the structure. When glue it in place, have it pressed both to the side supports on the ends and against two of the supports themselves, so it’s pressed into the corner on either side. Also, makes sure the curved side is oriented right so that when the structure is turned right side up, the curved bit will be on top!


Adding Feet
Almost there! Remember the mark you had on the bottom boards that you’d need later. Now’s later. Add glue to the bottom of the support structure and a tiny line across the side support where it’s a touch long. Take your bottom board, and line up that mark with the outer edge of one of the supports. Press into place to secure to the supports and side support. Repeat this for the other side with the other bottom board.


Base Support Braces
Let the glue set up then turn the structure over so it’s right side up. You can now take your bottom braces and attach them to the bottom of the guillotine. Note the small cut marks on one end (we’ve highlighted them here in white), this end goes onto the bottom board, and the other slanted end goes against the supports. Place all four at the bottom of the guillotine.


Finally, you can add the decorative panels to these supports. Note that one end is cut at more of an angle. This end goes up, the other end goes toward the bottom of the support.


