Materials Used
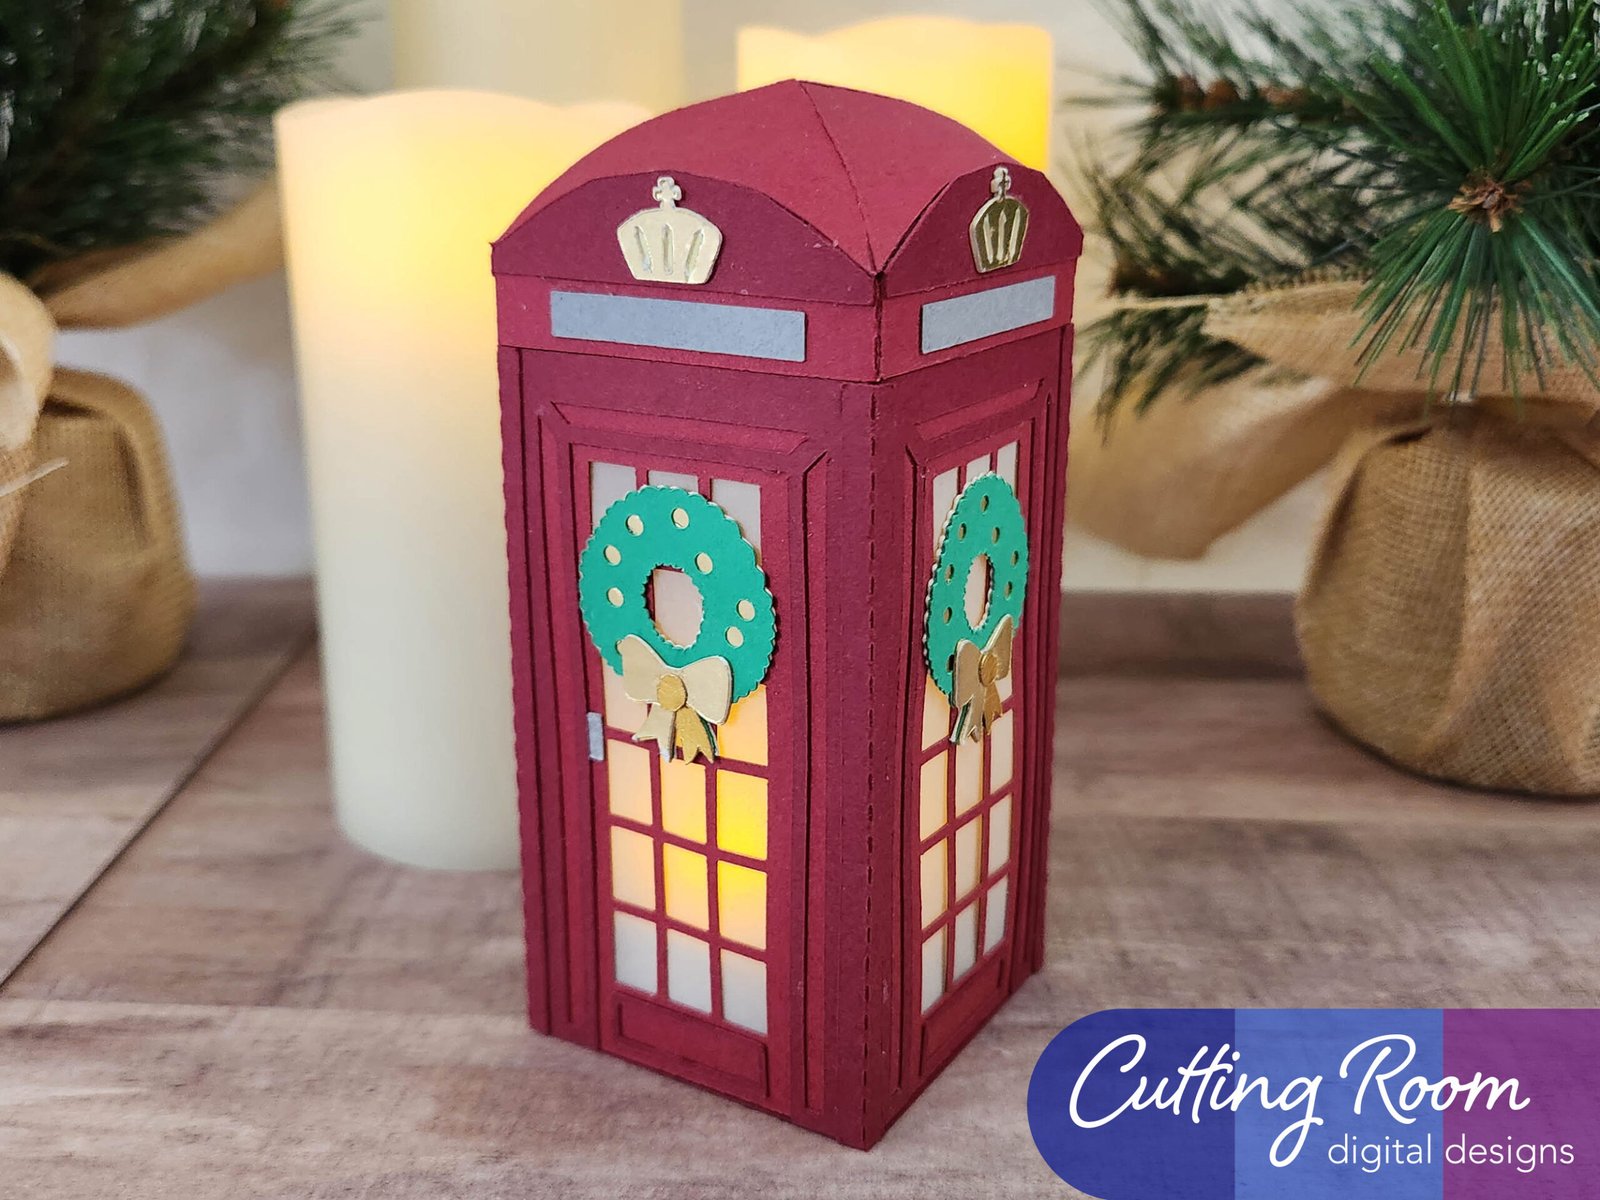
We used several products and supplies in the making of our cute Christmas village phone booth. Below is a list of what we used.
- Christmas Village Phonebooth Tealight Decoration – Digital Download SVG
- Recollections cardstock
- Recollections Gold Cardstock
- Art Glitter Glue
- Vellum
- Battery Powered Tealight Candle With Timer
- Electric Cutting Machine – Cricut or Silhouette
***Note that this post contains affiliate links and we may receive compensation if you buy something using one of our links. ***
Assembling The Phone Booth Sides
To start, we folded on the score lines on the base panels. Then added glue to one of the long tabs, attaching that panel to its neighbor. We continued this until we had all four lined up but didn’t finish to make a square shape just yet.


Adding Vellum
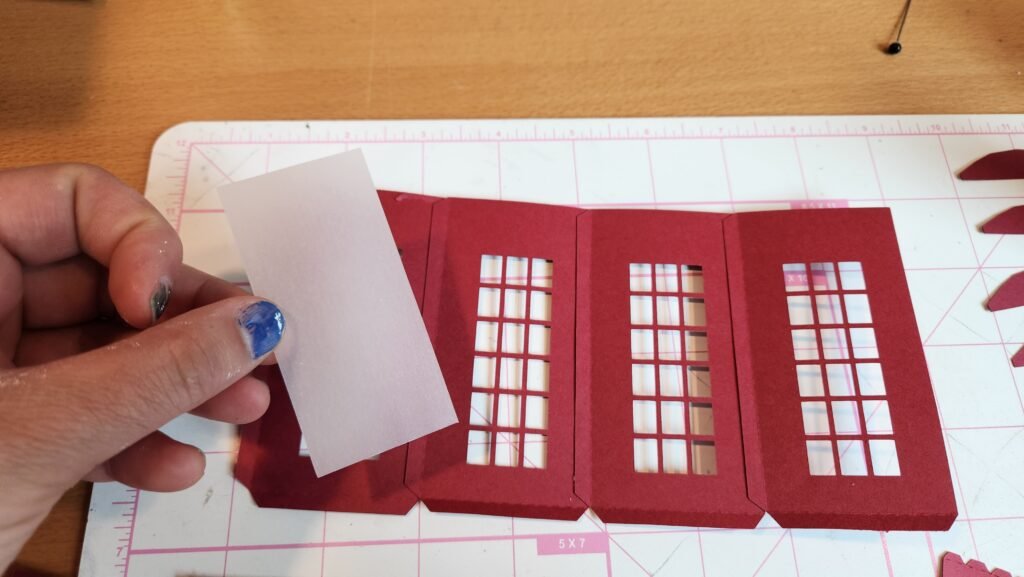
We then turned this over to the back side where you can see the tabs, and added the vellum to the back of each window cut out area.


With these in place, we added glue to the last long tab and folded around to create a square shape.


Decorating The Phone Booth
We then laid it flat so we could see two sides at once, and added the decorative panels to each side of the phonebooth. One of the sides will get the small grey door handle added later, though you can do this now if you want.


Closing The Bottom
Stand up the phonebooth into the box shape, and fold in the tabs at the bottom. We added glue to the inside of the tabs and placed the smaller of the two bottom panels into the inside of the phonebooth. Than using the flat end of a craft knife, reach in and apply pressure to the panel and the tabs.


We then took the corner panels and folded them length wise, added glue and used them to cover the sems of the decorative panels on each corner. Once these were secured in place (making sure they are flush with the bottom of the phonebooth) we turned the phonebooth over and added the base panel to cover the exposed tabs.


Assembling The Roof
Our next step was to assemble the lid of the phonebooth. This is done by starting with the four rectangular pieces to form the curved top. Fold in all the tabs and attach the top one to the next triangular panel. Once this is done, you can work your way down the line of tabs a couple at a time. As you go it will start to be more curved. Finally, you’ll attach the last panel to the first, a couple tabs at a time until you have a completed shape.


Next, we started attaching the vertical part of the lid, this will help the curved part have a nicer shape (ours always seemed to want to twist a bit until this was attached) and allow it to close onto the phonebooth. This is attached using first the curved tabs on the top, you can start with one on an end to get it secure into the corner then work your way across. Once one panel is in place, start on the next. Each panel is attached to its neighbor with another tab as well. These need to be secured in place so that the lid maintains its shape.


Once all four were in position, we started adding the decorative panels to the lid.


Phone Booth Door
Our final step was to decide which side to make the door and add the handle. Then we assembled the wreaths and attached them to the sides of the phonebooth.


Leave a Reply