Materials Used
We used several products and supplies in the making of this easily personalized basketball jersey gift box. Below is a list of what we used.
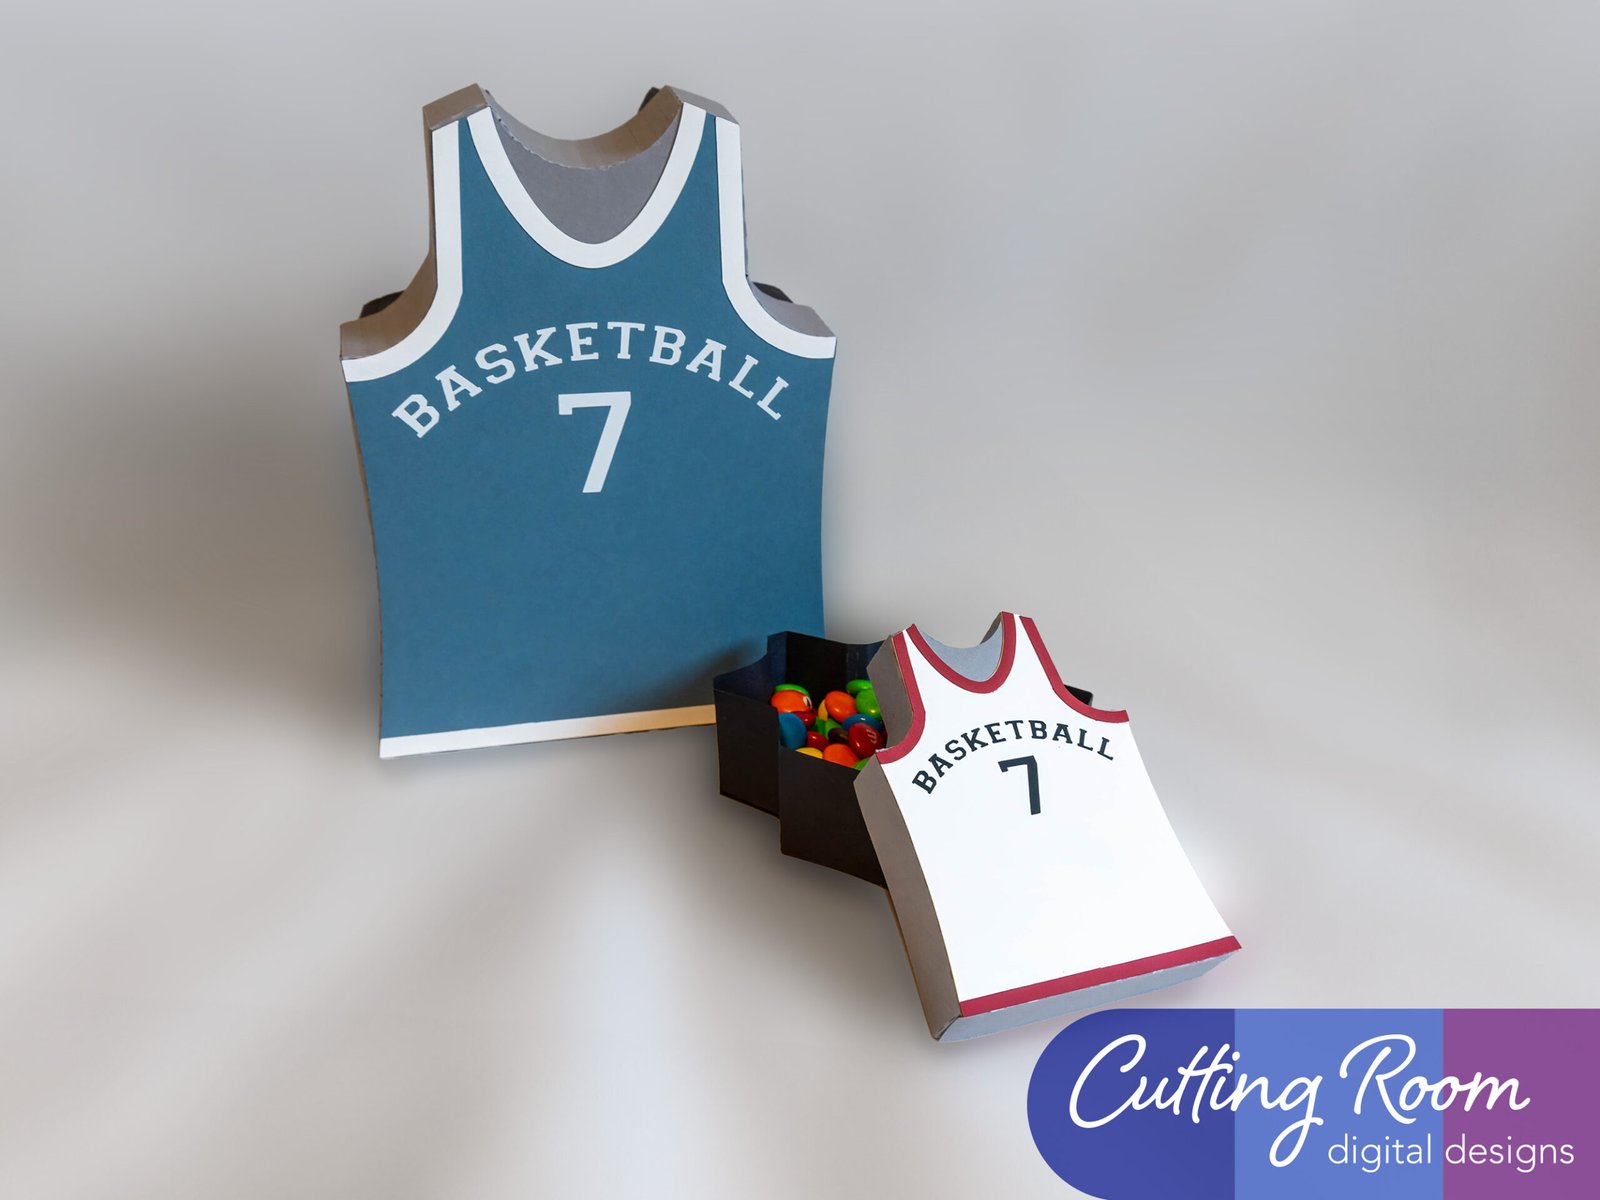
- Basketball Jersey Gift and Treat Box Set – Digital Download SVG
- Recollections cardstock
- Permanent Vinyl
- Art Glitter Glue
- Electric Cutting Machine – Cricut or Silhouette
***Note that this post contains affiliate links and we may receive compensation if you buy something using one of our links. ***
Small Box Assembly
The lid and the base of this gift box go together the same. The only difference is the base is deeper than the lid and a tiny bit smaller. Below are step by step directions and photos for the assembly of the lid. We chose this because the bottom of the box was done in black making it hard to get good detail photos. However, the assembly of the lid and the bottom are the same.
To start, the lid (or base) is made of four pieces. The two for the sides and the two to close off and give the gift box its jersey shape. We folded in the tabs and on the individual score lines. You don’t need to fold all the score lines. Where there are a bunch together, those help with the curved part and don’t need to be folded. The ones you want to fold are the first and last score lines in that line up and any stand alone score lines. The second photo below shows what we mean about the score lines.


Once these were folded, we attached the two side panels end to end to create a wonky shape. The jersey shaped panel will slowly get this into position so don’t worry too much right now.


We then added glue to the long straight panel and attached the bottom of the jersey. Make sure that the corners are very carefully aligned and not off to one side or the other. This will set up the rest of the panel to fit correctly in place.


We then worked our way around one section at a time. First the sides to the left and right of the shirt. Then where the arms would be, and finally the shoulder/neck line. We added glue to the tabs in one section, folded them over, then held them in place against the jersey. Once we had one section done and secure, we moved on to the next.


Once this is complete and the glue is set, turn the box top (or bottom) over and attach the other jersey shape that you have. This will reinforce the box and cover the exposed tabs.


If you were building the bottom, then it’s complete.
Decorating The Small Gift Box Lid
If you are working on the lid, then all that is left is to decorate the top. We did this by adding piping to the decorative jersey top in local team colors. For the letters we used vinyl because moving all those letters one at a time and getting correct alignment didn’t sound like a fun Saturday night. If you want, this is a place you could change the wording to a school or player’s name. You can also change out the number to fit your player.


Our advice, if you chose to do vinyl: before applying the vinyl to the box you need to de-sticky your transfer tape or it may damage your paper when you pull it off. To do this get the vinyl on the transfer tape. Thank take your finger and touch the transfer tape a bunch – transfer tape only, not the back of the vinyl. This weakens the sticky on the transfer tape enough that it shouldn’t cause any tearing or damage to our paper.

The final step is to attach the jersey to the front of the box.


Large Box Assembly
The large gift box is assembled on the same basic directions. There is just one difference, because of the size, the sides of the lid and base had to be broken into a few pieces. You’ll note that they have markers on their tabs, this will help you to get them in the correct order. You start with the I, II, III, and finally the panel with no marker. Once you have attached them in order end to end – left to right with the tabs/markers facing up – you can attach the non marked panel to the other side of the I panel. You will now have a large wonky shape that will become a jersey outline.


We then added glue to the long straight panel and attached the bottom of the jersey, again making sure that the corners are very carefully aligned and not off to one side or the other. This will set up the rest of the panel to fit correctly in place.


We then worked our way around, one section at a time. First the sides (left and right of the shirt) then where the arms would be. Finally the shoulder/neckline. We added glue to the tabs in one section, folded them over, then held them in place against the jersey, using our table to help. Once we had one section done and secure, we moved on to the next.


Once this is complete and the glue is set, turn the box top (or box bottom) over and attach the other jersey shape that you have. This will reinforce the box and cover the exposed tabs.


If you were building the bottom, then it’s complete.
Decorating the Large Gift Box Lid
If you are working on the lid, then all that is left is to decorate the top. We did this by adding piping to the decorative jersey top in local team colors. For the letters we used vinyl because moving all those letters one at a time and getting correct alignment didn’t sound like a fun Saturday night. If you want, this is a place you could change the wording to a school or player’s name. You can also change out the number to fit your player.

Our advice, if you chose to do vinyl: before applying the vinyl to the gift box you need to de-sticky your transfer tape or it may damage your paper when you pull it off. To do this get the vinyl on the transfer tape. Thank take your finger and touch the transfer tape a bunch – transfer tape only, not the back of the vinyl. This weakens the sticky on the transfer tape enough that it shouldn’t cause any tearing or damage to our paper.

The final step is to attach the jersey to the front of the box.


