Materials Used
We used several products and supplies in the making of our versatile cauldron decoration. Below is a list of what we used.
- Witch’s Cauldron or Leprechaun’s Pot o’ Gold – Digital Download SVG
- Recollections cardstock
- Color Petal Ink Pad
- Jute Twine String
- Tim Holts Brushed Bronze Distressing Stain
- Art Glitter Glue
- Electric Cutting Machine: Cricut or Silhouette
***Note that this post contains affiliate links and we may receive compensation if you buy something using one of our links. ***
This cauldron is so fun and versatile. And it’s easy to put together. Double win!
Assembling The Cauldron
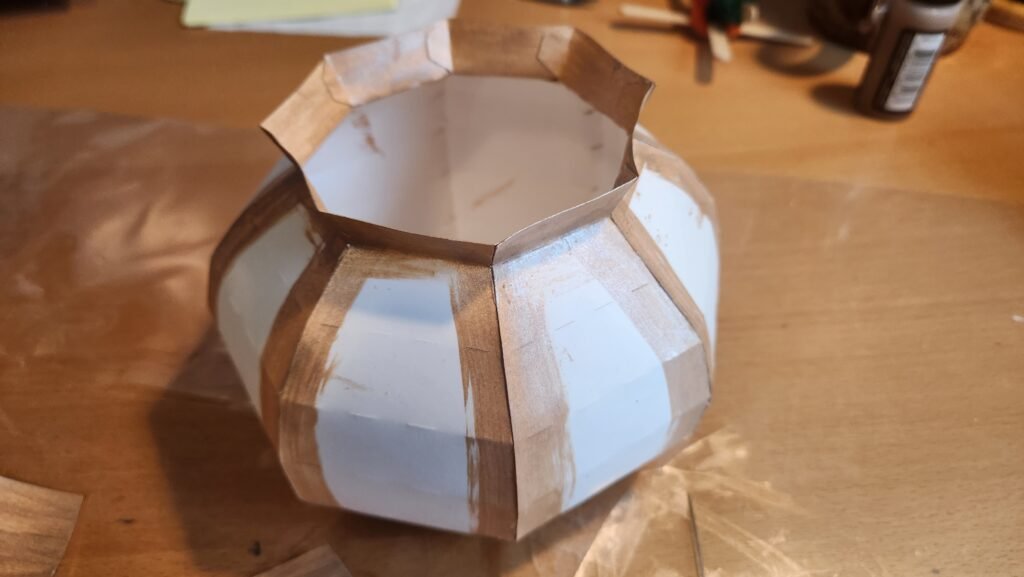
The box portion is put together similar to several other rounded files we have. There are eight panels that are identical so you can use them in any order. I find it easiest to start at the bottom and glue a couple tabs then move up as the glue sets. I use a liquid glue most of the time so going slow helps and making sure that the bottom ones are secure and in place properly makes the rest come together nicely.


Put some glue on the inside tabs of the bottom and position the inside bottom liner to line up with the tabs. Then use a pencil or other tool to apply pressure and create a good seal.


Once the base is secure, turn the box upside down and glue the other base panel in place to cover up the tabs.

Decorating The Cauldron
There are also decorative panels to add to the outside of the box allowing for a smoother face and more decorating opportunities. To apply them, I only glued the top and bottom in place. Not gluing the entire thing allows for a smoother appearance. When applying the decorative panel, line the top of the panel up with the top fold/score line, glue in place, then smooth the panel down to secure at the bottom.


With this done, the basics of the caldron are complete and the decorations chosen will give it a different feel and holiday.
Decorating For St. Patrick’s Day
For the St. Patrick’s Day version, we cut the clovers out and glued them back to back with fishing line between, allowing them to hang in a column from the neck of the cauldron. As shown above, we also chose to use bronze ink on the decorative panels to give them a more Pot ‘o Gold look. We also made the Leprechaun hat and glued them back to back, allowing the hat to move and not worry about seeing an unfinished back should it accidently turn over. We then secured it to the neck of the cauldron, before adding a bow to complete the project.


Decorating For Halloween
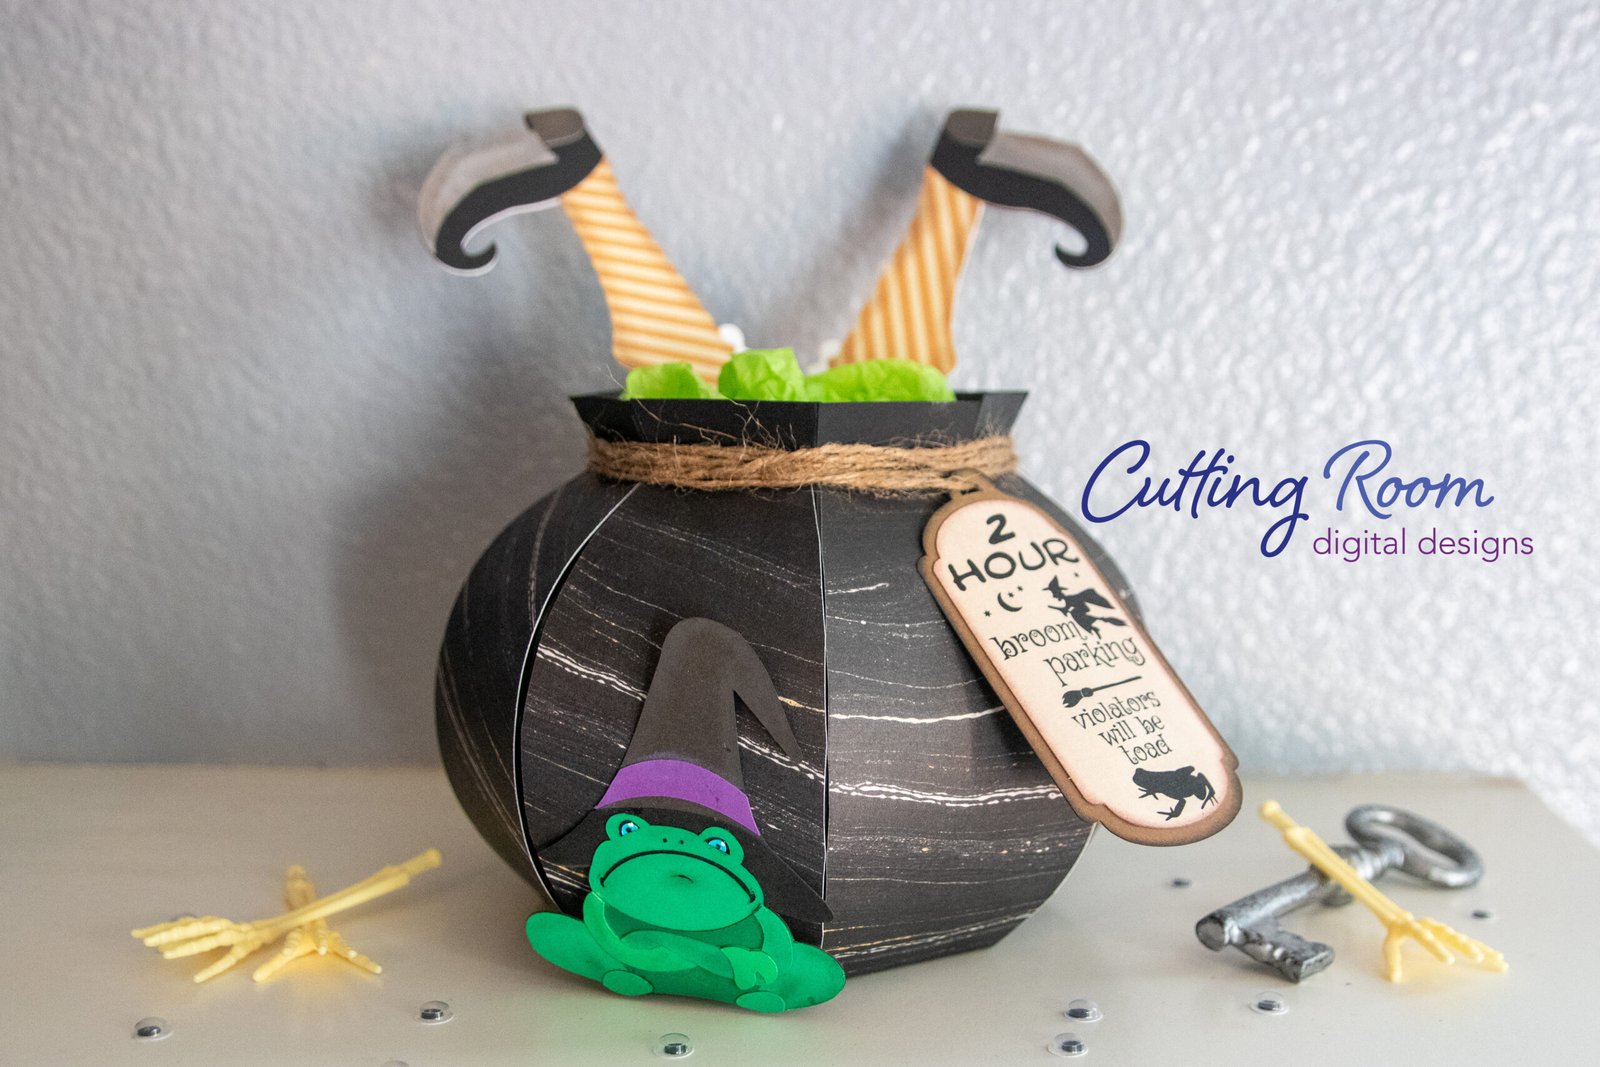
For the witch’s cauldron version we made the legs so they are front and back, this just lets it be viewed from any direction and have a completed/polished look. Then we glued them to the inside lip of the cauldron as shown.

The sitting toad is a one-sided image, and we assembled the toad then glued it on the side of the cauldron. To be sure it would sit correctly, we sat the cauldron on the desk, put some glue on the back of the head and hat area, then pressed it to the cauldron to glue in place. The legs are not glued to the cauldron as this would cause the toad to curve with the cauldron shape which was not the look we were aiming for.

The other toad, we assembled, then put glue over the full surface before attaching to the back of the cauldron.

The tag as some very small lettering. The file comes with the option to cut as individual pieces, but this was more than we were interested in. So we chose to print and cut the first layer with the lettering, add some ink then attach to the second layer cut from regular cardstock. This gave a nice look without as much hassle. To attach the tag, we wrapped some baking twine around the cauldron and put it through the loop in the tag.


