
Materials Used
We used several products and supplies in the making of our Overland Stagecoach. Below is a list of what we used.
- Stagecoach Centerpiece Wild West Party Decoration – Digital Download SVG
- Recollections cardstock
- Art Glitter Glue
- Gold Vinyl
- Chipboard
- Ranger Holtz Ink
- Fine point black marker
- Electric Cutting Machine: Cricut or Silhouette
***Note that this post contains affiliate links and we may receive compensation if you buy something using one of our links. ***
The stagecoach takes some time to put together and familiarity with 3D paper crafting is highly recommended.
Wheels And Stagecoach Support
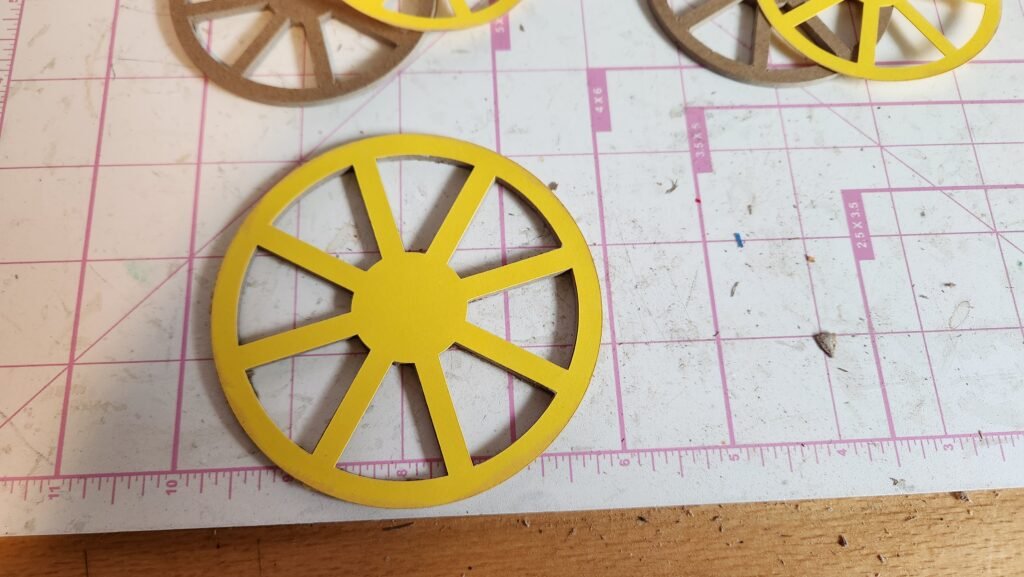
To start building the stagecoach, we started with the wheel and support structure. This is made up of several pieces. For us, we started with making the decorative part of the wheels. Partly because that’s the fun part, and partly because they are made of several small pieces and we didn’t want to lose or damage them while working. These wheel pieces are solid in the center, they are not the ones with a square cut out in the center. Those will be used for construction later.


With the wheel decorative panels complete, we started to make the two axels. These are identical, what will make the axels different is the vertical posts that will be placed in them. One is shorter than the other to compensate for the difference in wheel size.

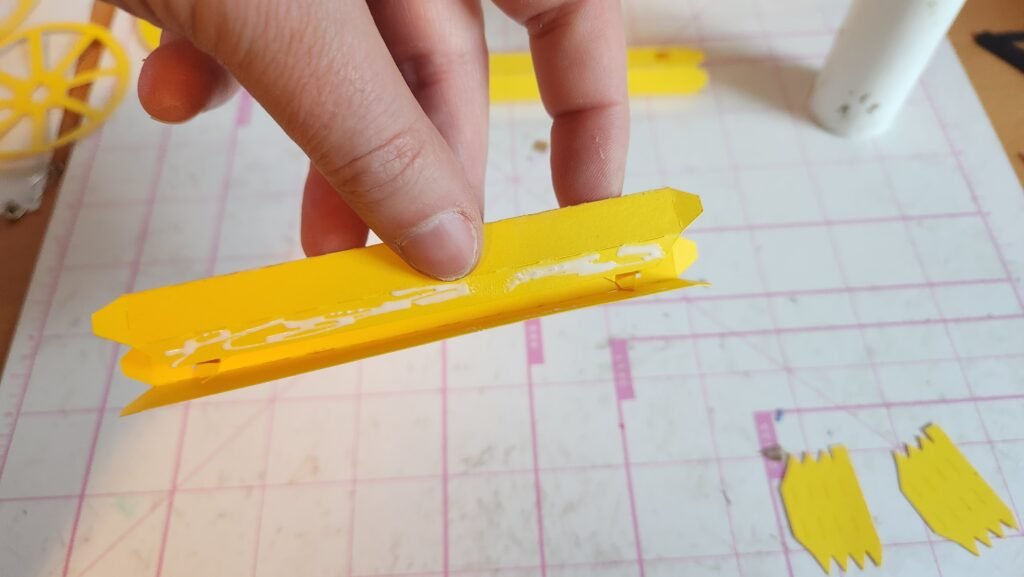
We took the small posts and folded on the score lines then added glue to the long tab and attached to create a long square post. We then folded the three triangle tabs in on one end, added glue, and closed the end with the square tab. Repeat this process with all four posts.


With all four of these done, set aside one of the axel panels, and two of the posts. These two posts should be the SAME SIZE. Take the other axel panel and two matching posts. Fold outward the triangle tabs on the posts, add glue and slide them through the squares in the axel so that they tabs are on what will be the inside of the axel.


With these in place, add glue to the long tab on the axel, fold on the score lines, and attach the tab to make a long rectangular box.

Repeat this process for the other set of posts.

The ends of this construction are left open with some tabs. These tabs will be used to attach the axel to the wheels. This is where it’s important to be sure you have the long posts and the short posts straight. You will attach the axels to the wheels the same way, but it’s important which axel set goes to which wheel.
The axel with the SHORT posts will be for the LARGE wheels.
The axel with the LONG posts will be for the SMALLER wheels.

Place the square hole in the center over the axel so that the tabs are through to the other side. Add glue and fold them back to secure in place. Repeat this for all the wheels, making sure to match the size correctly to each axel.


To give the wheels strength, we cut the wheels out in chipboard. Start by attaching the decorative panels to one side of the chipboard wheels. Then secure these decorated wheels to the wheels on the axels by adding glue and pressing with your fingers all around to get a strong hold.


Our next step in making the support structure for the stagecoach involves more chipboard. This is to provide a strong and wide base for the stagecoach to sit. We started by layering two of the pieces of chipboard using plenty of glue and something heavy to press down on it while the glue set. We then added a black cardstock panel to one side. With one constructed we repeated the process a second time so we had two of these.


Once that was done we added the other cover panel with a post on either end. The trick here is getting them attached so this black panel is a mirror image to each other when on the assembled chipboard pieces. We chose to take a black marker on color on the chipboard to help it blend.


Once these panels were secured in place, we laid the wheel and axel assemblies on the table. We then added glue to the vertical posts and secured the black paper/chipboard assembly so the vertical panels match up with the long and short posts. You want the smooth, side with the post panels to be pressed onto the post.


Once we had the first of the black paper/chipboard assemblies attached, we stood the wheels right side up, added glue to the other two posts and attached the other assembly.


Stagecoach Cabin Assembly
To start the stagecoach cabin assembly we decorated the side panels. We cut all the pieces in one go and wanted to get all these small pieces together and let’s be honest, the decorating is the fun part! Attach the decorative panel to the base panel to give some definition to the side of the coach. We also have some square panels that go on the front and back of the coach. You can use the windows to help make sure this panel is aligned correctly.


Our next step was to add vinyl decorations to the side of the coach. We recommend using vinyl instead of paper as it will be easier to place all the fine parts, especially the lettering. We chose to not attach the panel that says OVERLAND STAGE just yet as we wanted to have the curtains in place when this gets attached. You’ll note that the horses head faces is opposite directions on the sides, this will be a detail to keep in mind later when we are attaching the coach to the wheel base.


We then took the curtain panels, folded on the score line and rolled them up in to small scroll like pieces. We used a little glue to keep them rolled up, but make sure that when doing this, you keep the glue at or below the score line. You want your tab to stay free.


Next we took the thin strips with, folded on the score line, and attached to the tab left on the scroll. For the two small window curtains, there’s only one of these thin strips. The other three, wider window scrolls have two. Place them so they are evenly spaced.


Once you have these in place, add some glue to the rest of the tab and wrap the panel around your scroll. If your scroll is super tight, you may need to cut off a little extra. If your scroll is a little lose, it may not meet at the end, but that’s okay. The backside won’t be seen. We then chose to take a fine point felt marker and add a small dot in the center like the narrow panel is buttoned in place or something.


We then secured the curtains to the part of the decorative panel that runs just above each window.


With the curtains in place, we added the OVERLAND STAGE panel.


With the decorative sides done we set them aside for a moment to put the coach box together. We placed the two panels side by side and folded on the score lines. Then we took one end tab and attached it to the other panel.


We then took the panel that has score lines on either end helping it to curve. This panel is for the bottom of the coach. Attach this panel using one of the tabs on the end and secure it as shown. Make sure the tab will be inside the finished construction.

The triangle tabs that will help with the curve can be placed on the inside or outside of the box, these will be covered with the decorative panels we just assembled. Add glue to the tabs on one side, and secure the panel in place along the curve, making sure to get a snug fit. Then continue along with the long tab, finishing with the triangle tabs at the other end. Once you have one side complete, repeat this process for the other side.


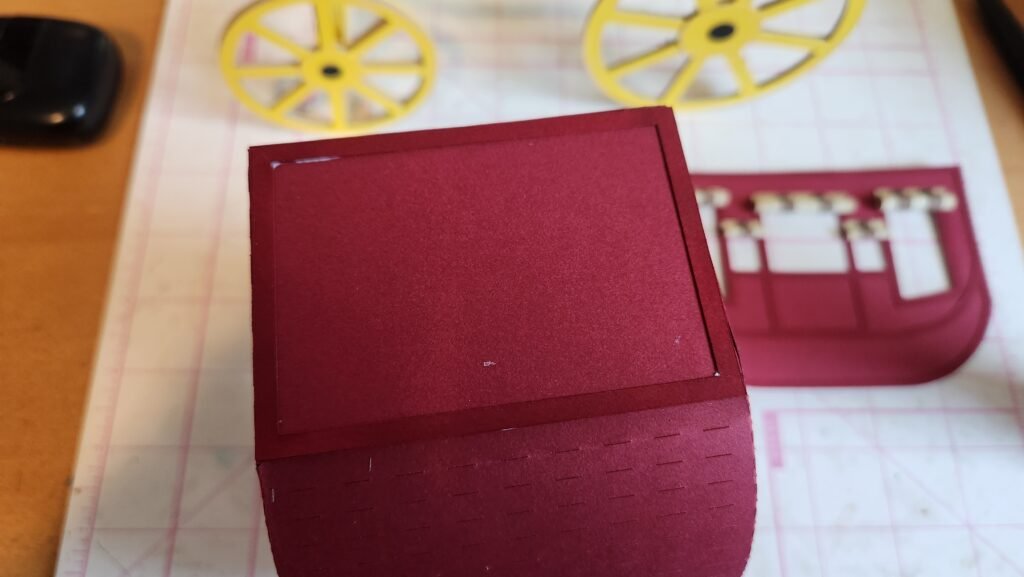
The top of the stagecoach is closed up using a rectangular panel. Start by adding glue to one tab and attach, making sure to get this panel squared up the the fold line.

Then add glue to the other tabs and secure.


Once we had the carriage structure complete, we added the decorative panels. There are the two side panels we’ve completed as well as two rectangular frames, one each for the front and back of the carriage.


Assembling the Seat
To assemble the seat we attached the long panel to the center of the shaped panel.

We then continued around on one side until all the tabs on the straight panels were attached. We then repeated this process on the other side. Leaving the curved end unattached.


We encouraged the curved end to curve, folded in the tabs, and secured them on each side.


We then turned the seat shape around, and folded the remaining small panel down and secured with the small triangle tabs.


Finally, we started to assemble the decorative panels for the seat. This consists of the base layer, two layers for the outside, a vinyl decoration piece not shown, and one layer that goes on the inside. Start by assembling the outer layer (sorry we didn’t get a photo of the vinyl in place at this point but it runs just inside the darker frame panel). Once this is done, flip the piece over and add the remaining decorative panel.


Repeat this process for the other decorative panel, it will be the same, but mirrored so they can go on opposite sides of the seat.


With these complete (minus the vinyl, sorry!) we attached the panels to either side of the seat construction.


Assembling The Luggage Rack
The luggage rack starts as one piece. Fold on all the score lines to start then begin assembling one side of the rack. As you work your way up you’ll notice that after the curve, the luggage rack folds outward then continues up. We chose to attach just the curved part on either side then continued up attaching the remaining tabs.


Once we had the luggage rack assembled, we set up to decorate. Again, sorry no photos of the inner decorative panel we cut in vinyl but it’ll be in photos later. After we assembled the decorative panels we attached them to the sides of the luggage rack.


Our final step in decorating the luggage wrack was to roll and decorate the canvas covers for the sides. These are done in the same manner as the window coverings.


Assembling The Parts Of The Stagecoach
Now it’s time to assemble what we have so far. We started by setting the stagecoach on the supports between the wheels. This may not be a perfect or flat fit, depending on how precise you were in assembly. If it’s a little off, that’s fine. You just need a few points of contact and some good glue.
While deciding your placement, keep in mind that the horses heads face the same direction. We set ours so that the horses faced toward the small wheels, and away from the large ones. This way they will be facing forward when the stagecoach is complete.
Once we had decided how exactly we were going to place the stagecoach, we added glue to the black supports. We decided to use our liquid glue as it is more forgiving than hot glue if you need to reset your coach. We used plenty to ensure we had a good connection. You can use hot glue, but it won’t allow you to adjust your placement when you set down your coach.
Once we were happy with our placement, we placed a hand under the coach to provide some counter pressure and support while we gently pressed down on the top of the carriage.


Set this aside to dry. You want to be sure your glue is fully set before you start the next step. Once the glue is dry and you are ready, you can add glue to the back of the luggage rack. Place it, centered on the back of the carriage, between the larger set of wheels. Gently press the rack into place by rubbing your finger against the inside of the rack, pressing it against the carriage.


We then added the seat to the carriage. Put glue on the back of the seat and place it so that it’s in the center (left to right) on the front and the bottom of the seat rests along the decorative panel. TUsing the decorative panel for orientation will help with placement and making sure the seat is level.


One Final Step
There’s one final piece to assemble and attach to the stagecoach. The brake is a little awkward at this stage to place, but if you do it earlier you risk bumping it and knocking it off the wheelbase.
The brake is made of one long panel and a small decorative panel. Fold both on their score lines. Then take the long panel, add glue to the long tab and create a rectangle shape.


Close up the end by folding in the tabs, add glue, then fold up the square panel to give it a finished end.


To add the handle to the end of the brake, add some glue to the inside of the decorative panel so that it will attach to the long box. There is a tab on one side, this should be attached first as it is just to ensure there’s no gap where the ends meet.


This is where hot glue may be helpful but we again chose our liquid glue. We just aren’t super great with hot glue but we do see how it could be helpful for this step. We added some glue to one side of the brake for the first half inch or so. A little extra won’t hurt. Place the brake on the right side of the stage coach (think passenger side in the US or driver’s side in the UK). The side doesn’t technically matter as it’s just decorative and no structural, but from our research while designing this stagecoach, we consistently saw it on this side.
Once you have the glue on the brake, press it to the post at the front wheel. We placed ours at an angle and held it in place, applying a little pressure while we waited for the glue to set.


With this you are done with the stagecoach! It’s a long build and has a lot going on but we love the final product and hope you do too! We’re happy to answer questions if you have any.
Leave a Reply