Materials Used
We used several products and supplies in the making of our 3D poinsettia flower. Below is a list of what we used.
- Poinsettia Flower Christmas Holiday 3D Flower Decoration – Digital Download SVG
- Recollections cardstock
- Cricut Glitter Pens
- Cricut Debossing Tool
- Ink Pads
- Art Glitter Glue
- Electric Cutting Machine – Cricut or Silhouette
***Note that this post contains affiliate links and we may receive compensation if you buy something using one of our links. ***
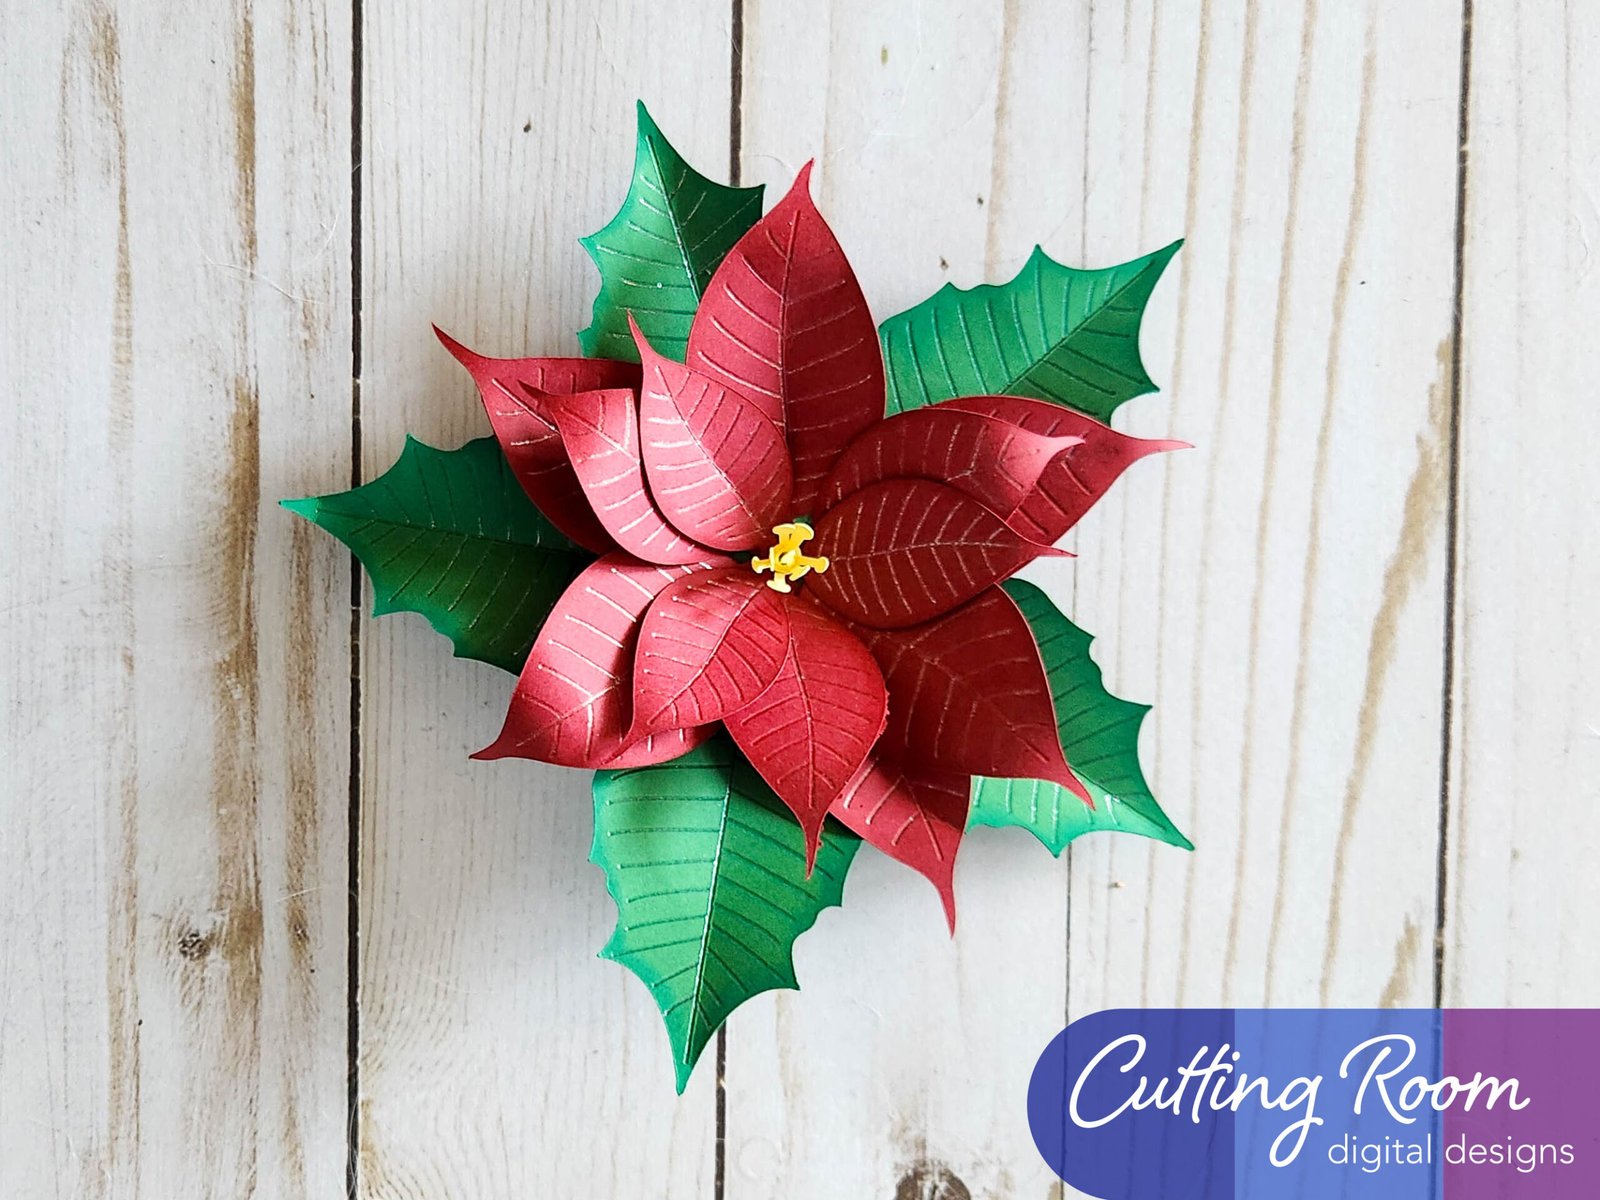
Our Poinsettia Embellishments
For both the flowers and leaves, you’ll notice that there are 2 embossing or cut lines stacked on top. In your cutting program, change one to “Deboss” and one to “Draw” then attach them to the cut of the shape itself. This will tell your cutting machine to do the pen and deboss (shown in the veining of the petals and leaves above) before cutting out the leave or petal shape. Once you have the pieces cut and any added embellishments (we chose to ink the edges of the paper using dark red and dark green ink pads) you can start folding and assembling.
Prepping The Leaves
Fold the leaves along the long vein that runs from the tip toward the center. Do this on all five of the leaves.

Prepping The Petals
We then started working on the petals. To get the petals ready, we folded along the long vein on each of the leaves, then we took a pencil or craft knife (anything round, smooth, and about that size will work) and curved about 1/3 of the petal to add some extra dimension to the flower. We completed this process for all four petal sections.

Assembling The Poinsettia Petals
With the petals ready, we stacked them on top of the other, with the larger two on bottom and the smallest on top. We chose to use hot glue on some of our flowers and craft glue on others. Both ways worked well. As you stack them, make sure to rotate the petals so that they don’t line up with the one below.


Adding The Stamen
Once you have all four petals stacked, take the stamen piece and roll it using a quilling tool or your fingers. Start on the long narrow end and add glue to help hold the whole piece in a right roll.


Once the glue is set, add glue to the bottom of the roll and press in the center of your flower.

Attaching The Poinsettia And Leaves
When this is set, you can add glue to the bottom of the flower and place it on the prepared leaf base.


Leave a Reply