
We have a video tutorial!
If you wish to watch a video assembly tutorial for our circus candy cart, we have one on our YouTube channel.
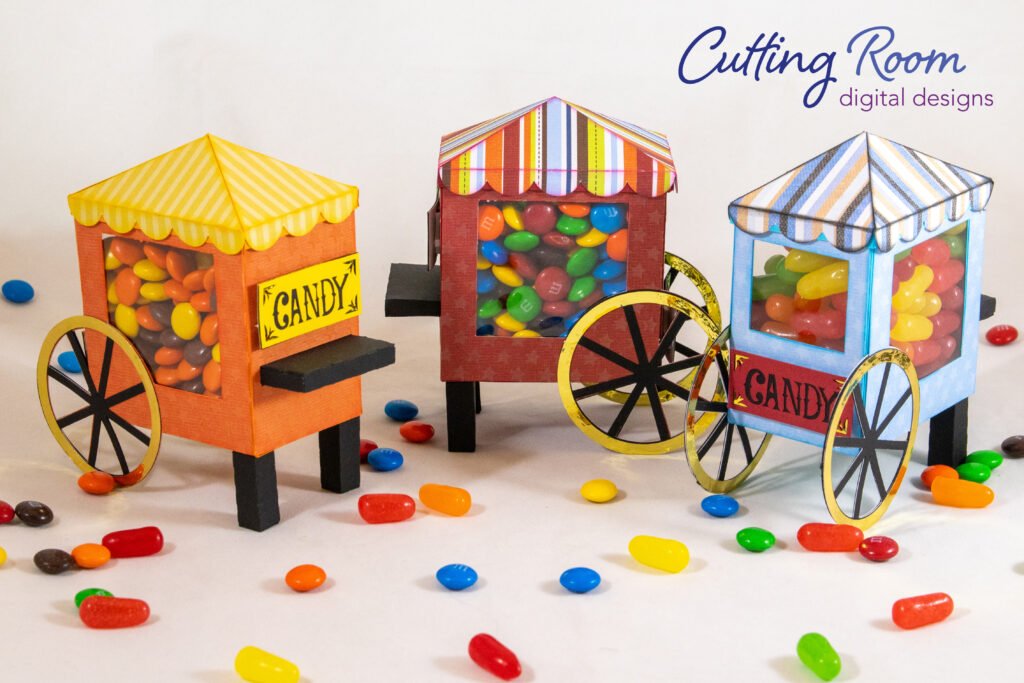
Materials Used
We used several products and supplies in the making of these cute little candy carts. Below is a list of what we used.
- Circus Candy Cart Treat Box Party Decor – Digital Download SVG
- Recollections cardstock
- DCWV All About Boys Paper Pack
- Gold Foil Cardstock
- Art Glitter Glue
- Acetate
- Electric Cutting Machine – Cricut or Silhouette
***Note that this post contains affiliate links and we may receive compensation if you buy something using one of our links. ***
Candy Cart Assembly
To start this file, we cut and assembled the four pieces that make the sides of the candy cart’s box. Add glue to each tab and attach to the next panel, making sure to have the larger/longer pieces alternate so you can have a rectangular shape when done. We did not yet connect the first with the last panel though, that will come in a moment.


Before completing the shape of the box, we turned the panels over and attached the cut out acetate squares. We’ve only ever used them for stencils in the past so attaching to cardstock was new to us. We chose to take some sandpaper to rough up just along the edge before adding glue. Then we added a little tape, making sure everything stayed away from the actual hole in the cardstock so it wouldn’t show in the completed box. We’re not sure if all this was necessary or if the glue was enough. (If you have more experience using acetate sheets with cardstock we’d love to hear how you attach it!)


With the cart windows in place, we added glue to the remaining side tab and completed the box shape. Then we folded the bottom tabs in and added glue to them. After that we dropped it into our box shape and used a pencil to apply pressure to secure the panel to the tabs.


To complete the base, we added glue to the other bottom panel and placed it on the bottom of the box to cover the tabs. This extra panel also further reinforces the bottom of the box.


Decorating the Candy Cart
Our next step was to decorate the sides and add them to the box. The wheels of the cart are part of the decorative panel for the sides. We added the wheel and wheel rim to both decorative panels. Then we turned them over and added wheels to the back side. Part of the wheel will be visible from both sides so we wanted to be sure it was decorated accordingly.


With the wheels complete, we added glue to the sides of the box and glued the decorative panels with the wheels in place one at a time. When positioning them on the box, we put the wheel side of the decorative panel toward the end of the box with the window opening. This puts the back window between the two tires.


Cart Supports
To support the front part of the candy cart, there are two posts. Fold along the fold/score lines and add glue to the long tab to create a rectangular box. Then add glue to the tabs on one end and fold in the square panel to close off the bottom. This leaves the four tabs on the other end to glue to the bottom of the cart.


Once both supports were assembled, we added glue to the tabs on the end and attached them to the bottom corners of the cart as shown.


Remaining Decorative Panels
The front and back decorative panels for the candy cart are the same size, but one has a window hole cut from it. We added the ‘candy’ sign to it then glued that panel to the cart.

The final step is to add the shelf to the other decorative panel. Fold along the score lines and add glue to the long tab on one side and glue to the inside of the decorative panel.


With this in place, slide the other long tab through the opening and also glue to the back of the decorative panel.

Now you can fold the tabs on the sides in and glue to close the sides.


Cart Lid/Roof
The main structure of the roof is in one piece. Fold along the score lines and add glue to the long tab. Attach this to the neighboring panel. Then add glue to the small triangular tab and glue to the the small neighboring panel. This will give you a vertical edge at the bottom of the lid.


The decorative panels for the lid come in four pieces. The two for the front and two for the sides. Fold along the score line and add glue, then position on the lid.


To finish the candy cart, attach the decorative panel to the cart.