Materials Used
We used several products and supplies in the making of our police car gift box. Below is a list of what we used.
- Police Car Gift Box – Digital Download SVG
- Recollections cardstock
- Art Glitter Glue
- DCWV Holiday Glitz Paper Stack
- Electric Cutting Machine: Cricut or Silhouette
***Note that this post contains affiliate links and we may receive compensation if you buy something using one of our links. ***
Decorating The Police Car
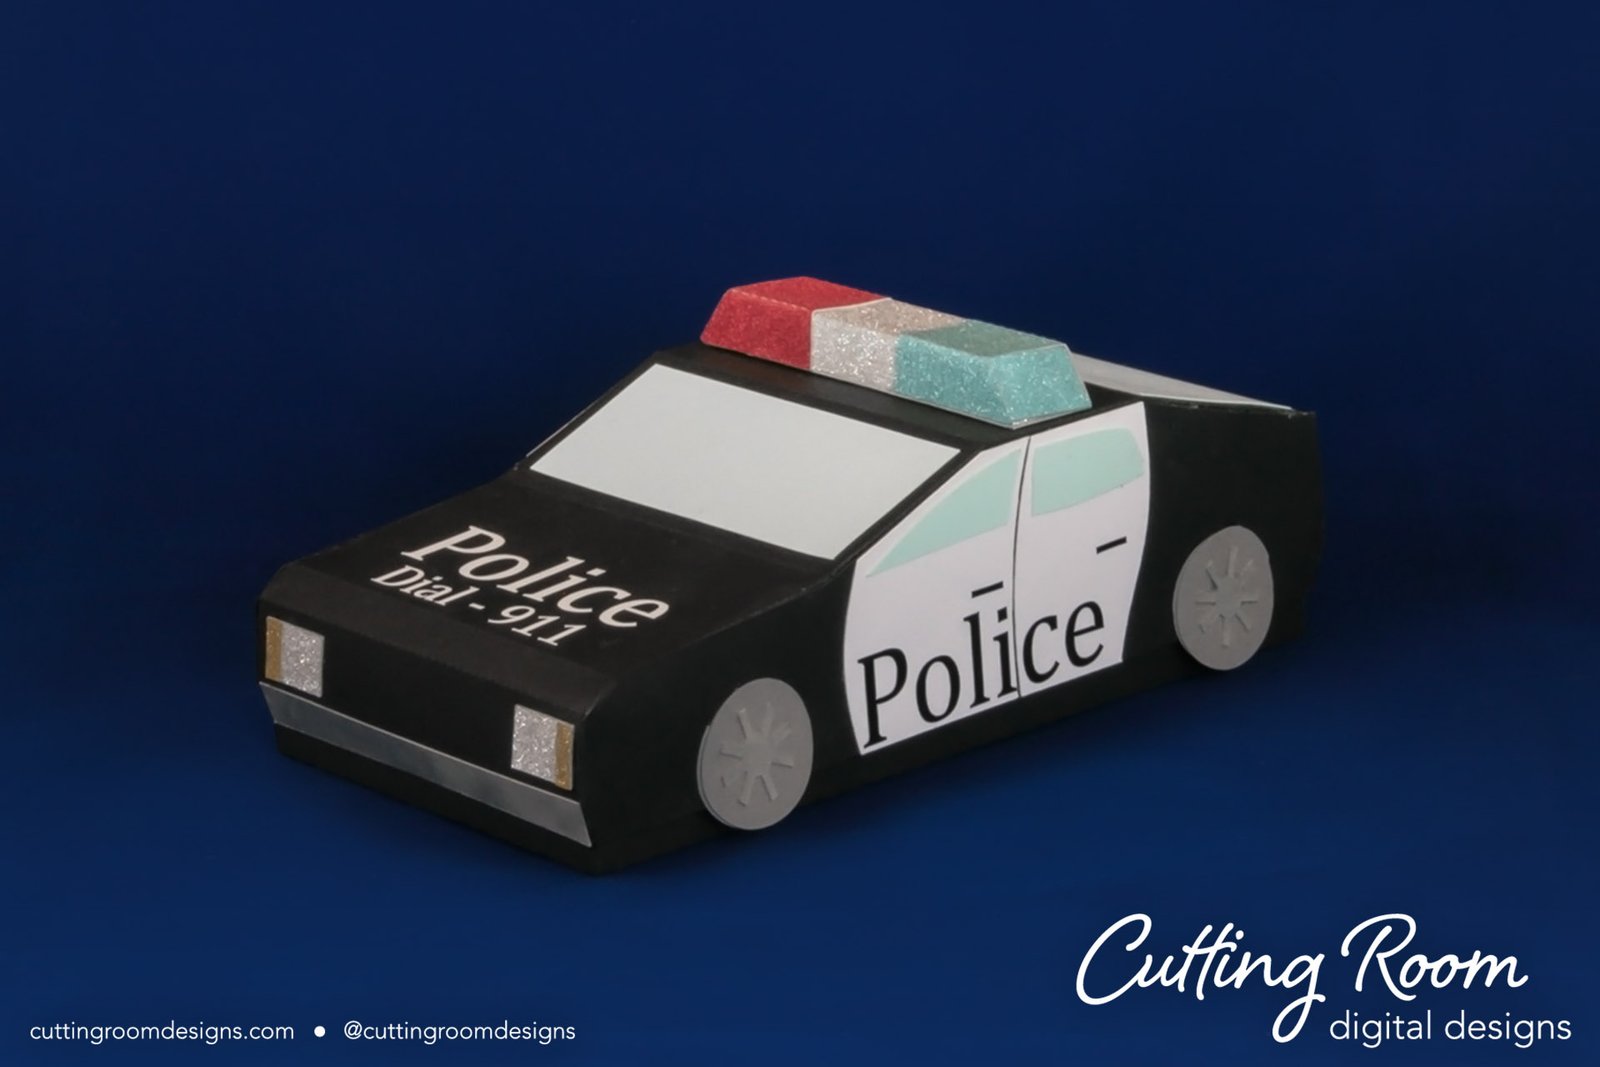
Before assembling the police car, we decorated the main panel. We applied all the embellishments except for the lights on top and the back bumper. We’ll get back to those, don’t worry! Before you start putting your embellishments on, check to be sure you know which end is the front of the car and which is the back. There is a small hole in a tab at the back of the car.


Once the top was decorated, we moved to decorating the sides of the car. For all the writing we chose to use vinyl. Everything can be done with paper, we just round it easier to do those little pieces in one move rather than individually. To prevent the transfer tape from damaging the paper, we touched the transfer tape being careful not to touch the vinyl words. This helped to reduce how tackiness of the tape.

For the lights on top, it comes in three pieces. The main piece is the white light. The blue and red lights wrap around the white light. Once the white piece was done we added the red and blue. We found some fantastic DCWV paper called Holiday Glitz that we used for all the lights. It gave everything a nice little sparkle without being over powering and cut great in our Cricut.


Assembling The Police Car
With the decorations complete, we moved on to assembling the car. We found it easiest to glue together one or two tabs at a time. Starting from the back, work your way forward until all tabs are attached on one side. Once complete, repeat for the other side of the car.


Now that the car is together I added the back bumper. Since it is bent over two sections I feel you get a better fit if you wait until the car is assembled.

Assembling The Base
The base is made using four sides and a base panel. Line up the the sides, alternating long and short. Then attach end to und until you have a box shape. One end, the front will be slightly narrower than the back. Once we had this done, we folded in the tabs round the bottom, added glue and placed the bottom panel to close of the bottom of the box.


Attaching The Wheels
Note that the car lid sits just slightly off the ground. I put glue on half of a wheel and attached it to the car, lining it up with the bottom of the box. That way it looks like the wheels are touching the table top.


To glue down the lights on top of the car we put glue on the lights and positioned them on top of the car. To help get a good connection, we put something on top to apply even steady pressure.
