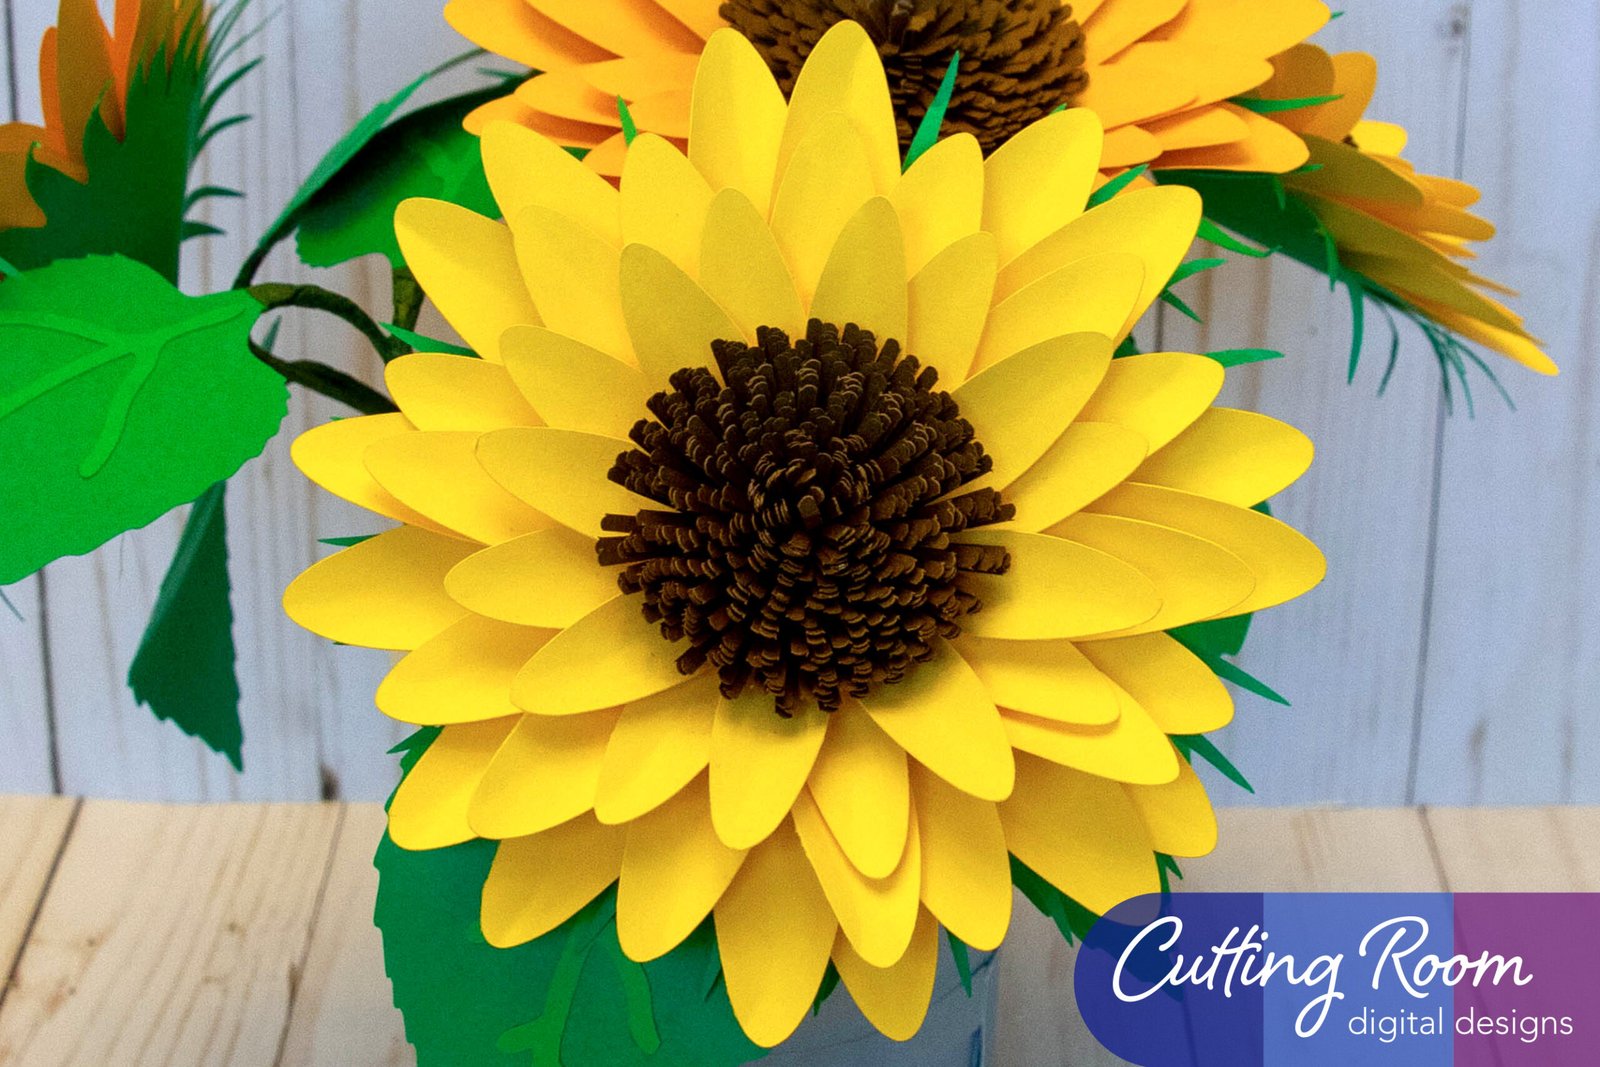
Materials Used
We used several products and supplies in the making of our sunflower. Below is a list of what we used.
- Sunflowers 3D Flower File Project/Summer Sunflower Decoration – Digital Download SVG – Flower Bucket Sold Separately
- Recollections cardstock
- Craft Chalk
- Hot Glue
- Electric Cutting Machine: Cricut or Silhouette
***Note that this post contains affiliate links and we may receive compensation if you buy something using one of our links. ***
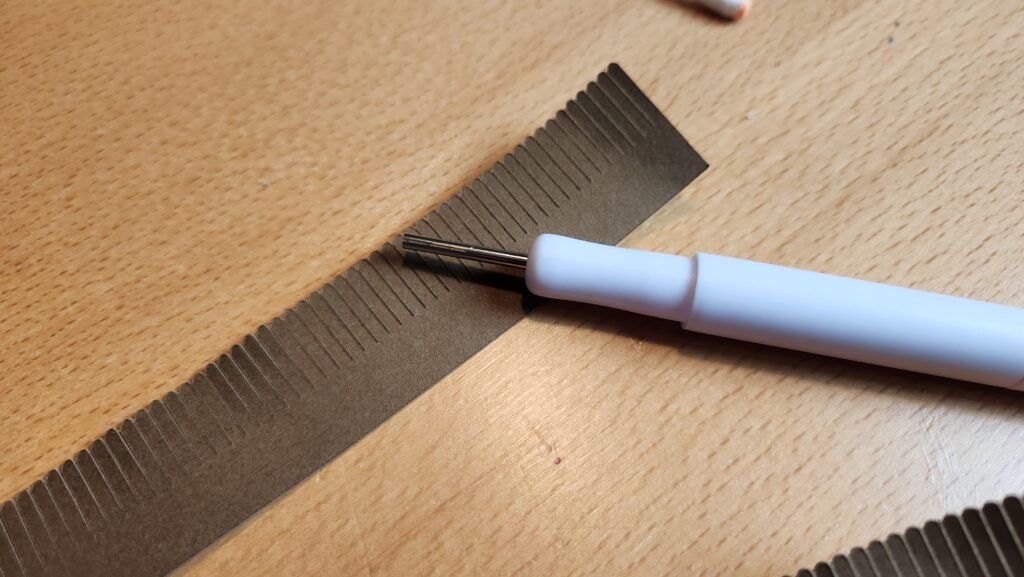
Making The Sunflower Center
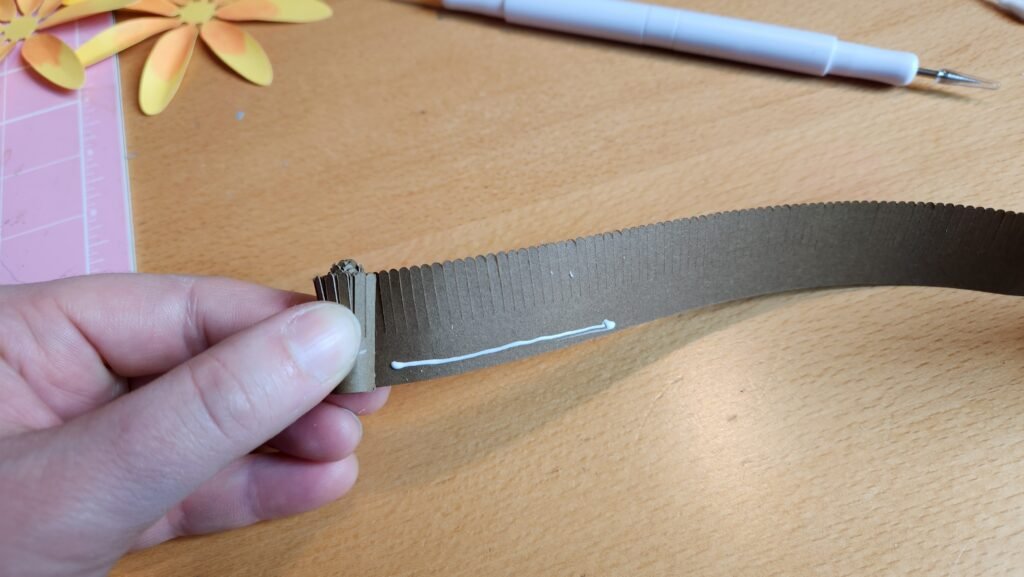
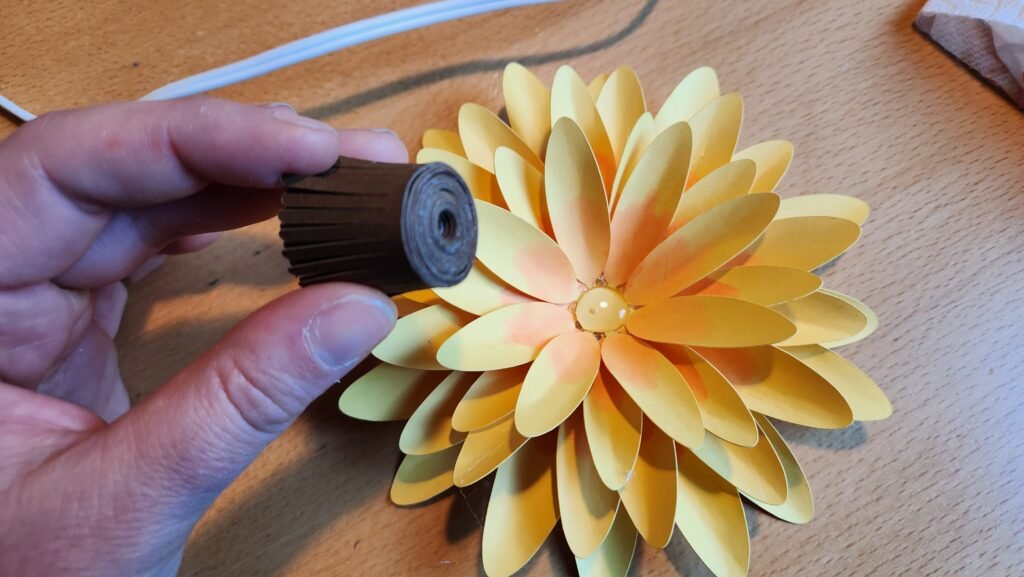
To assemble the sunflowers, we started with the center pieces. This is made of six pieces, two of each type. The first has a larger uncut margin at the bottom, the middle has less margin, and the third has very little which allows the pieces to fold outward much more. In the file, you’ll notice that they are set so the first two are on top, the second two are in the middle, and the last two to be added are at the bottom.
We started with the first two by taking a quilling tool (you can by hand too, but the tool helps) and rolled the entire strip to get it to take the rolled shape, then we unrolled, added some glue to the margin at the bottom and rolled the entire strip.
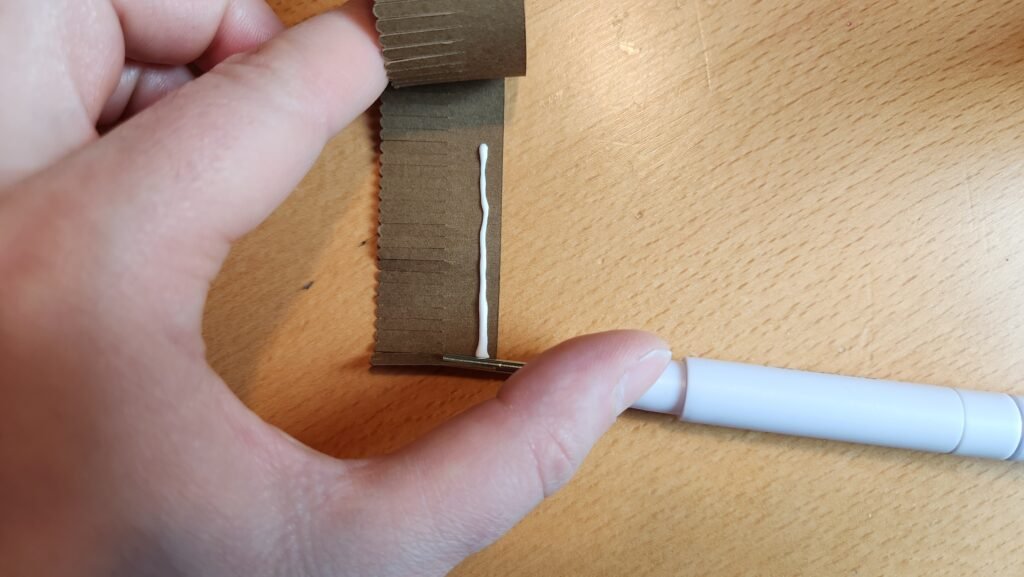

Once we had the first one done, we removed the quilling tool, added a little glue at the point where the paper ended, and butted up the next one, continuing to roll the paper.
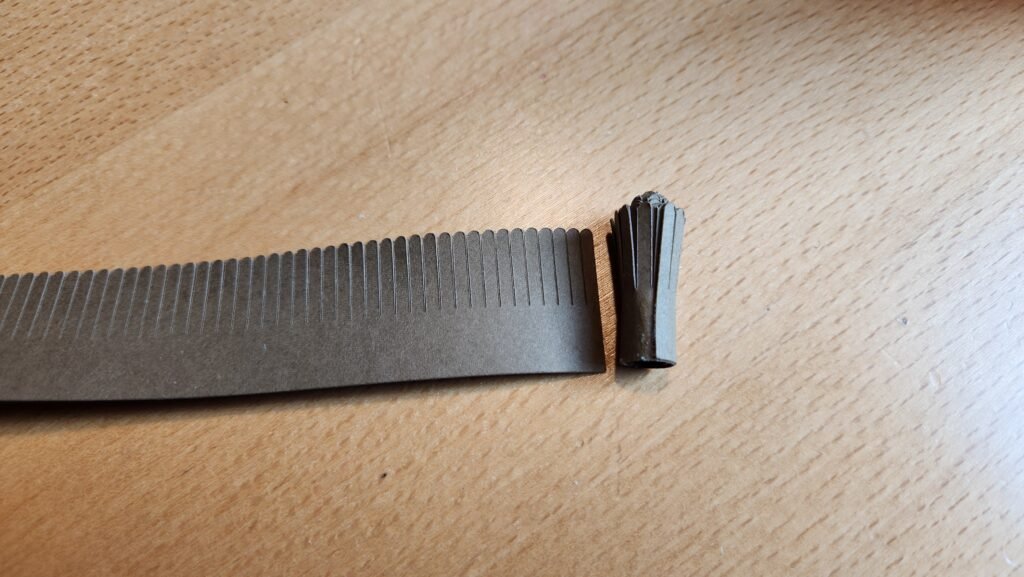
Continue this process until all the center piece panels are in place. This will leave you with a tight, narrow looking roll of paper.
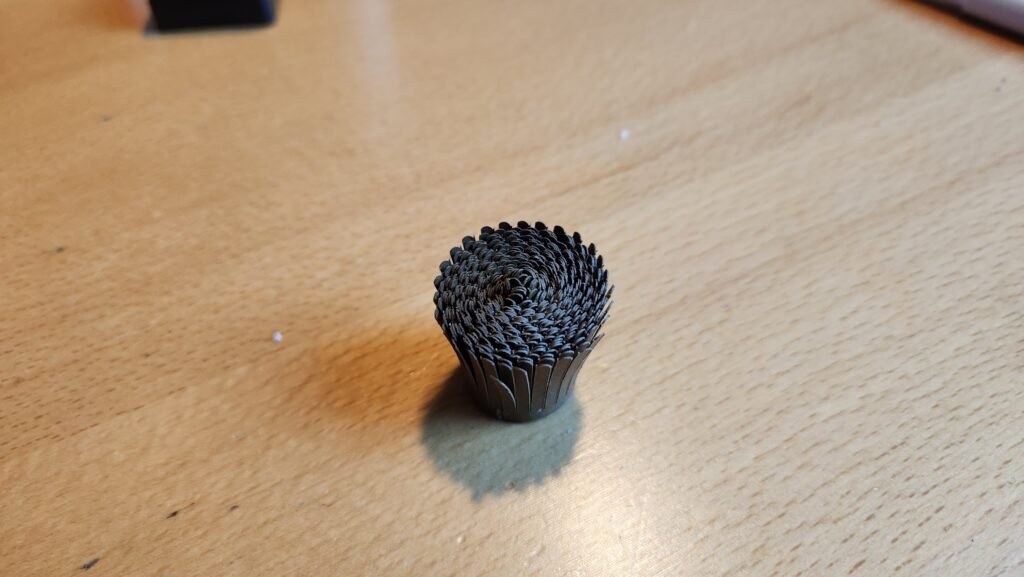
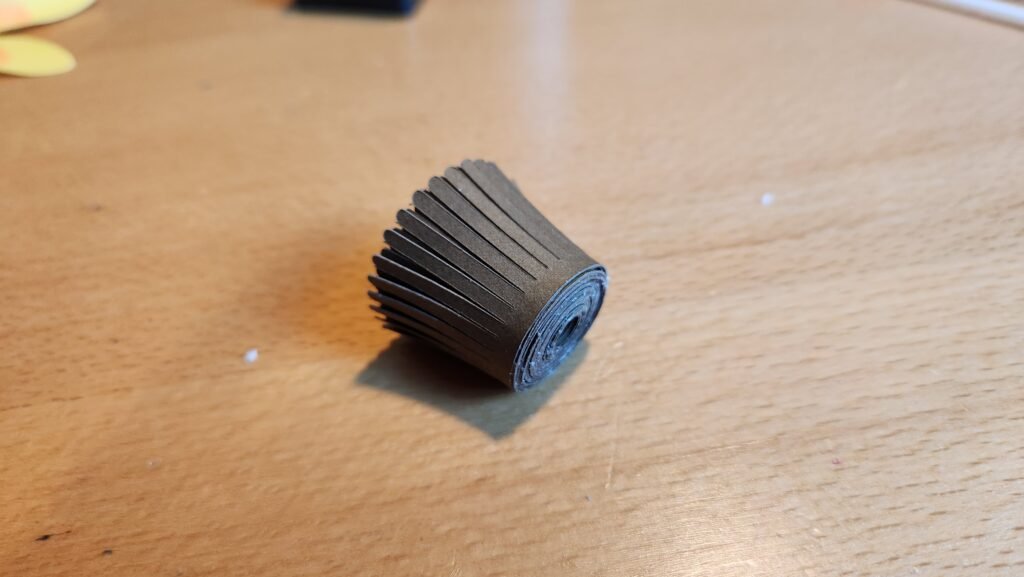
Set this part aside for now. We’ll work with spreading the top out later, for now it’s best to keep all the pieces vertical.
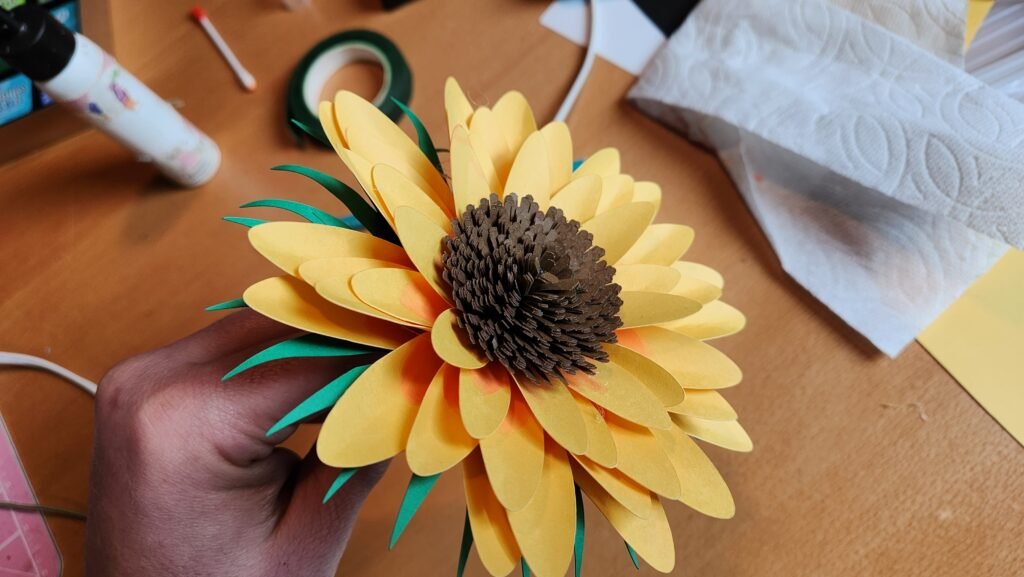
Decorating The Petals
Our next step was to make the flower petal portion. There are six pieces. We made the sunflowers both with and without adding some chalk. Our photos show the chalked version, we just added a little on the inner half of the petal. Once this was done, we took a pencil, placed it in the center of the petal and curved the petals up to give them a little shape and movement.

Layering The Petals
With all six pieces ready, we started with the two largest. We added some hot glue to the center of one, and placed the other on top, making sure to offset the petals so they don’t nest into each other. That will happen a little, but halving them off center helps.
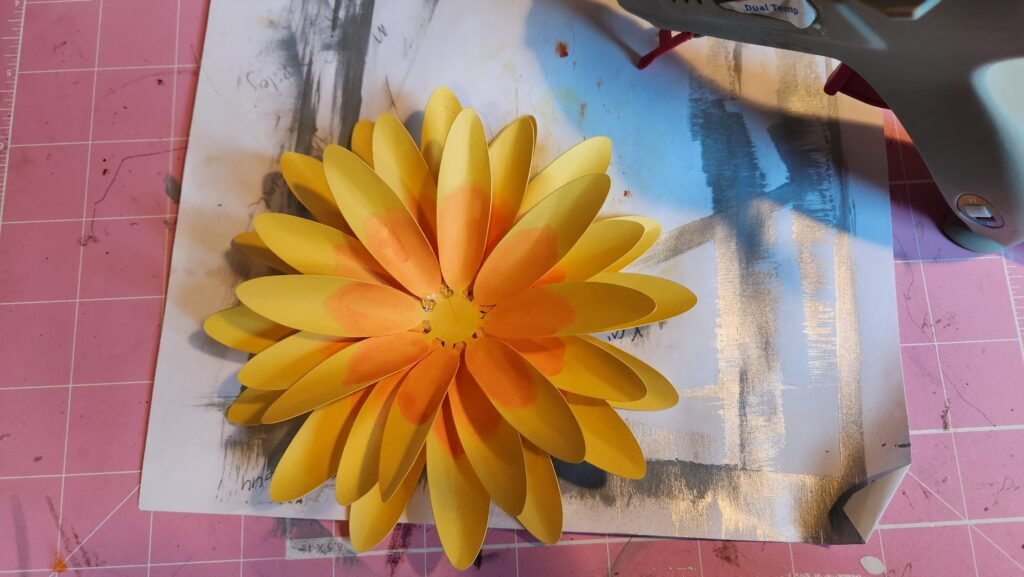
We continued this with the medium sized petals, making sure to continue to offset from the one below, then did the same again with the small petals.
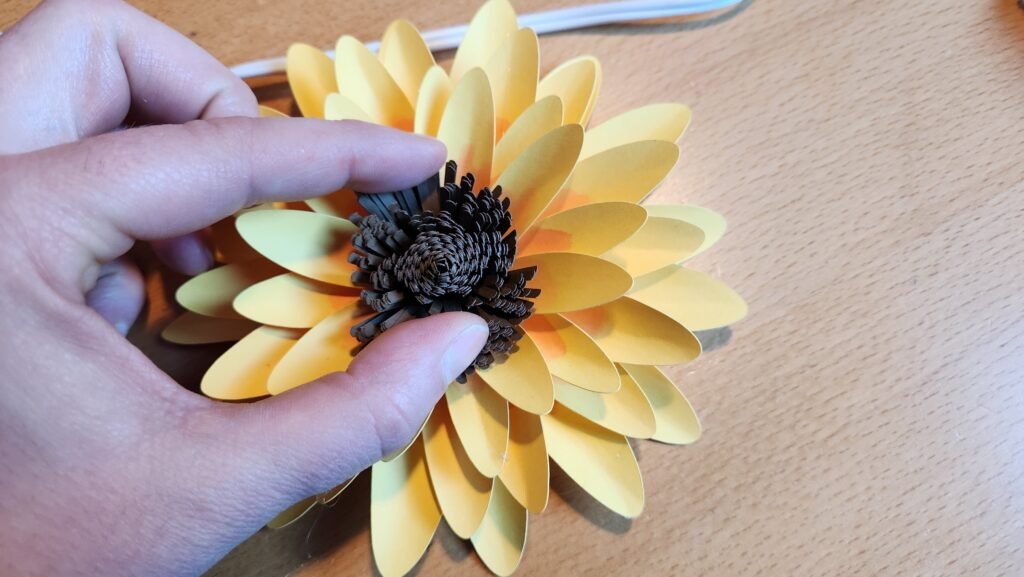
Adding The Sunflower Center
Once all six were in place, we added glue to the center and pressed the flower center down, holding it in place while the hot glue sets. With the center placed, we started to spread the center out to
Adding The Leaf Base
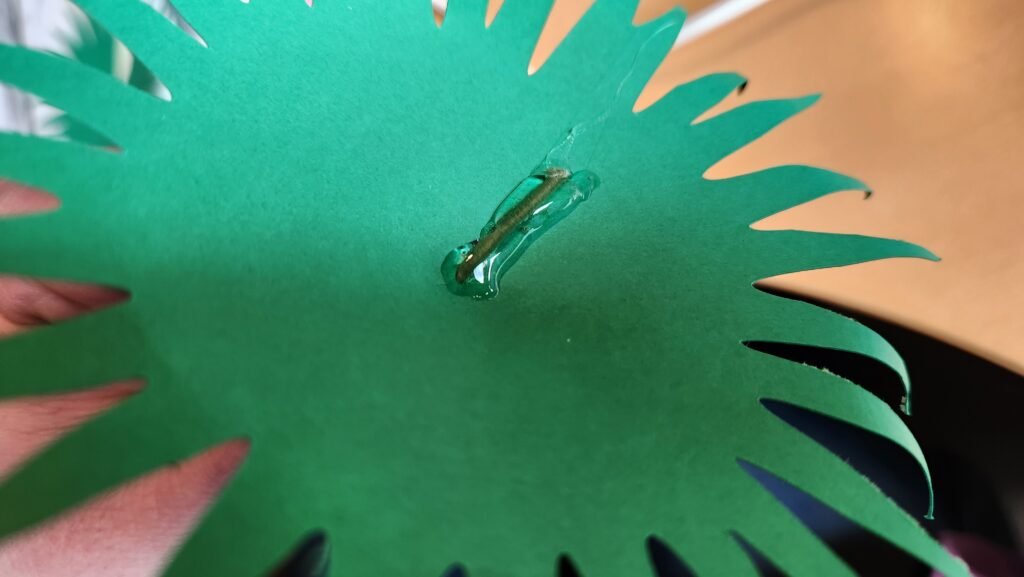
Once it was fully spread out, we took the green support piece and added glue along the split then attached to the other side of the split, creating a little bit of a cone shape.

Once this was in a cupped shape, we took our stem wire and wrapped the hole thing in floral tape, leaving the top inch free of floral tape. slid the unwrapped portion through the hole in the bottom of the support cone, bent it a little, then hot glued it in place.
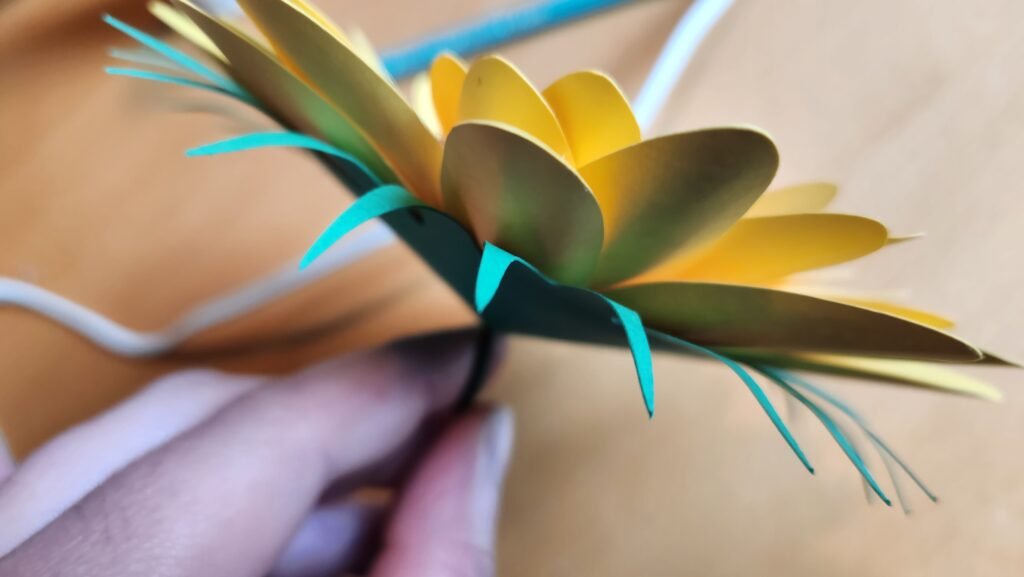
We then added a generous amount of glue to the inside of the cone, and pressed our sunflower into place.
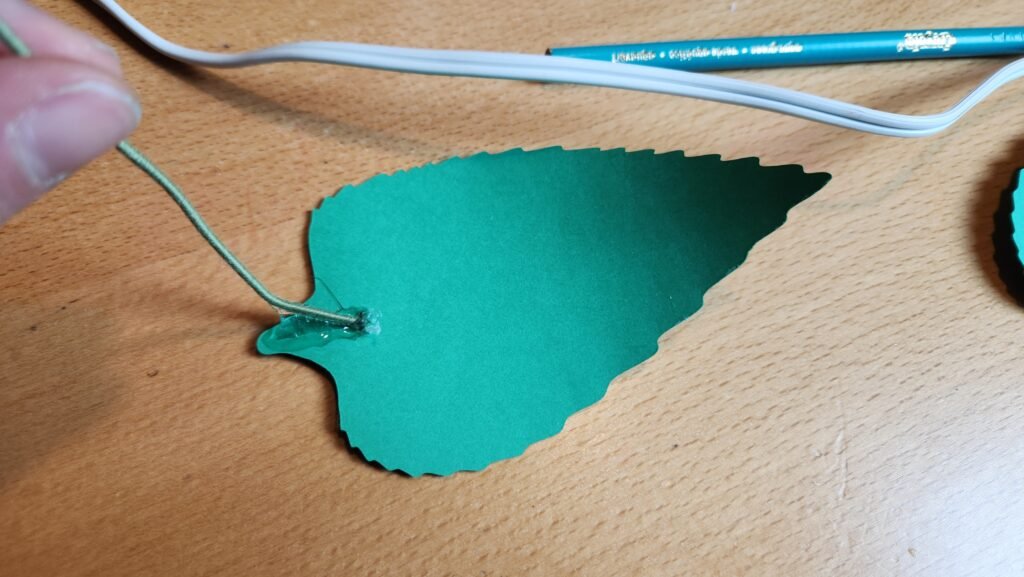
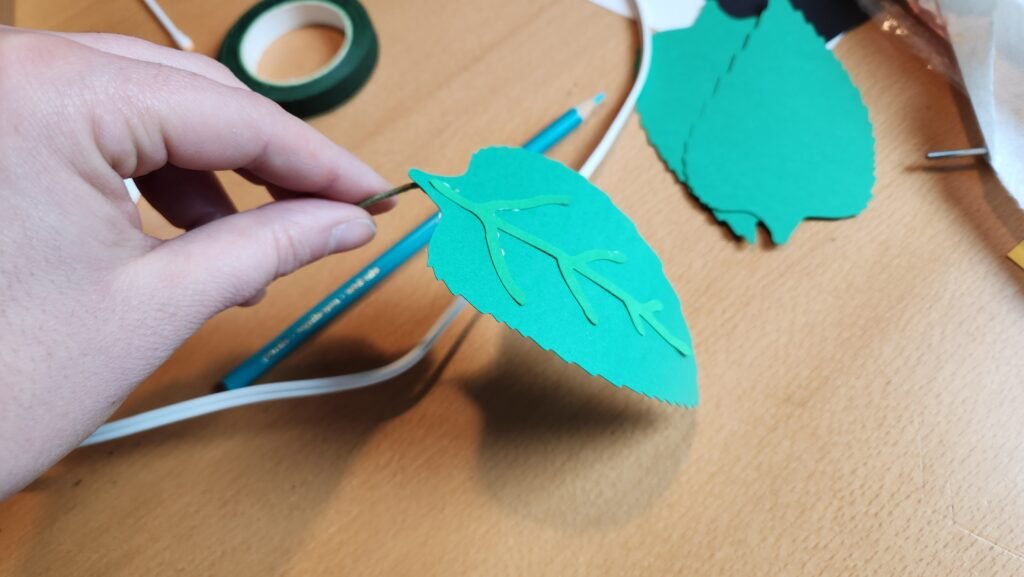
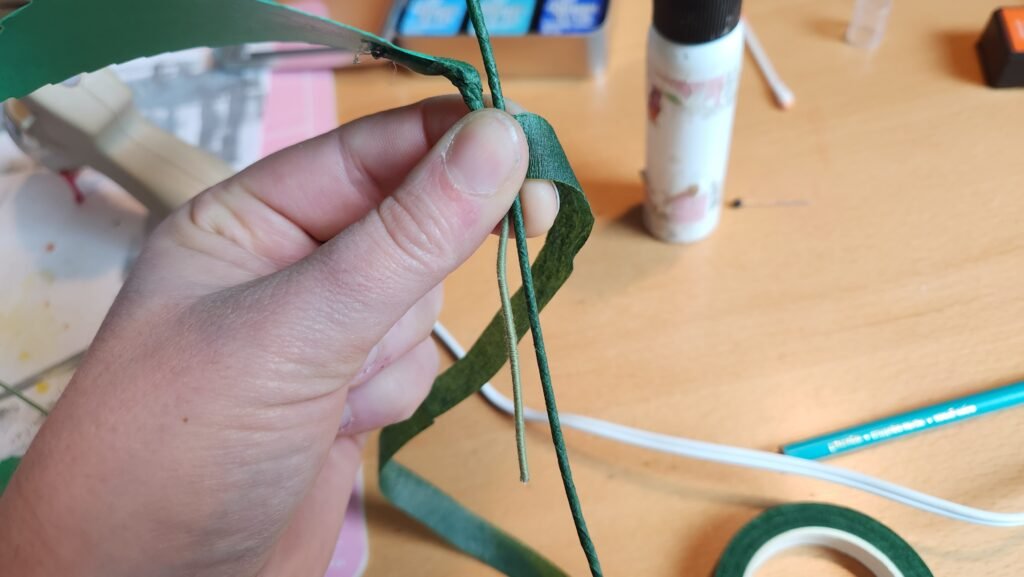
Making Sunflower Leaves
We took a short section of floral wire with no floral tape. Then we glued this to the back of our sunflower leaf. Once the glue was set, we used our fingers to encourage the leaf to have some curve and shape.
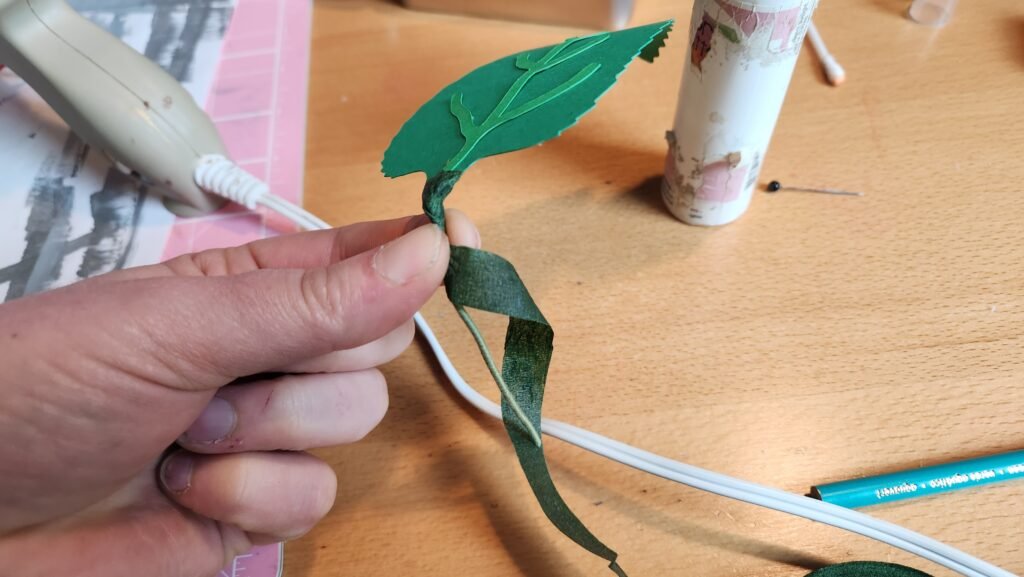
Next, we took some floral tape, wrapped it around where the leaf meets the wire, then wrapped down a little from the leaf. Then we lined up the remaining wire to where we want the leaf on our sunflower and wrapped the leaf wire onto the sunflower stem.
We chose to do this a second time on some flowers so they had 2 leaves, other flowers we left with just one. We angled the flowers a little to curve them, then pushed each into the foam in the bucket, arranging the flowers how we wanted them to be, filling the bucket and obscuring the view of the stems as much as possible.
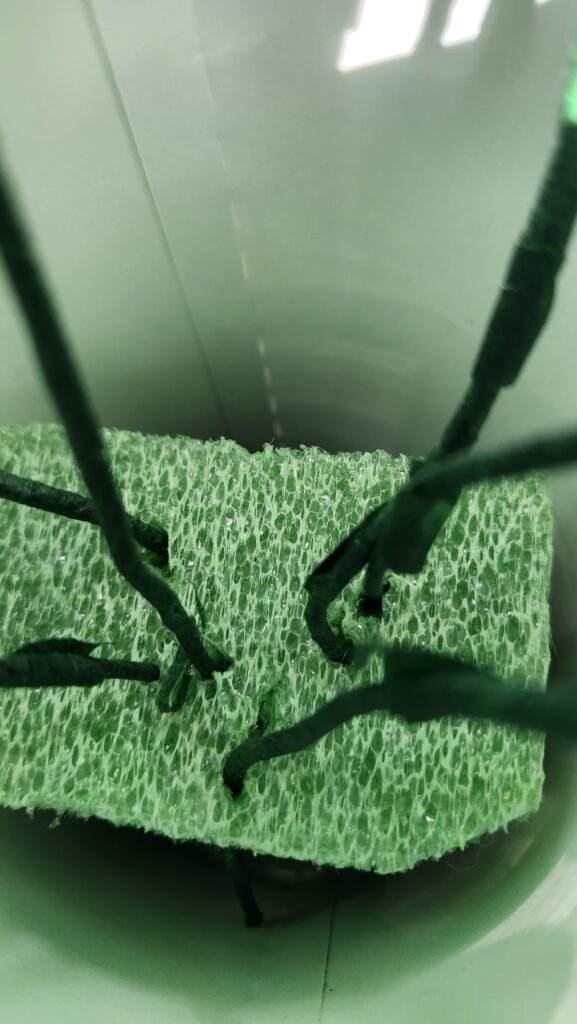
A Little Extra Reinforcement
To help keep the flowers in place once we place them in the bucket we used a floral foam purchased at the craft store. We cut a chuck off the block that would fit in the bucket and placed it in the bottom. If the bucket feels a little tippy for your tastes, we found that uncooked rice around the outside helps weight it down a little.
Leave a Reply