Materials Used
We used several products and supplies in the making of our spooky Halloween carriage decoration. Below is a list of what we used.
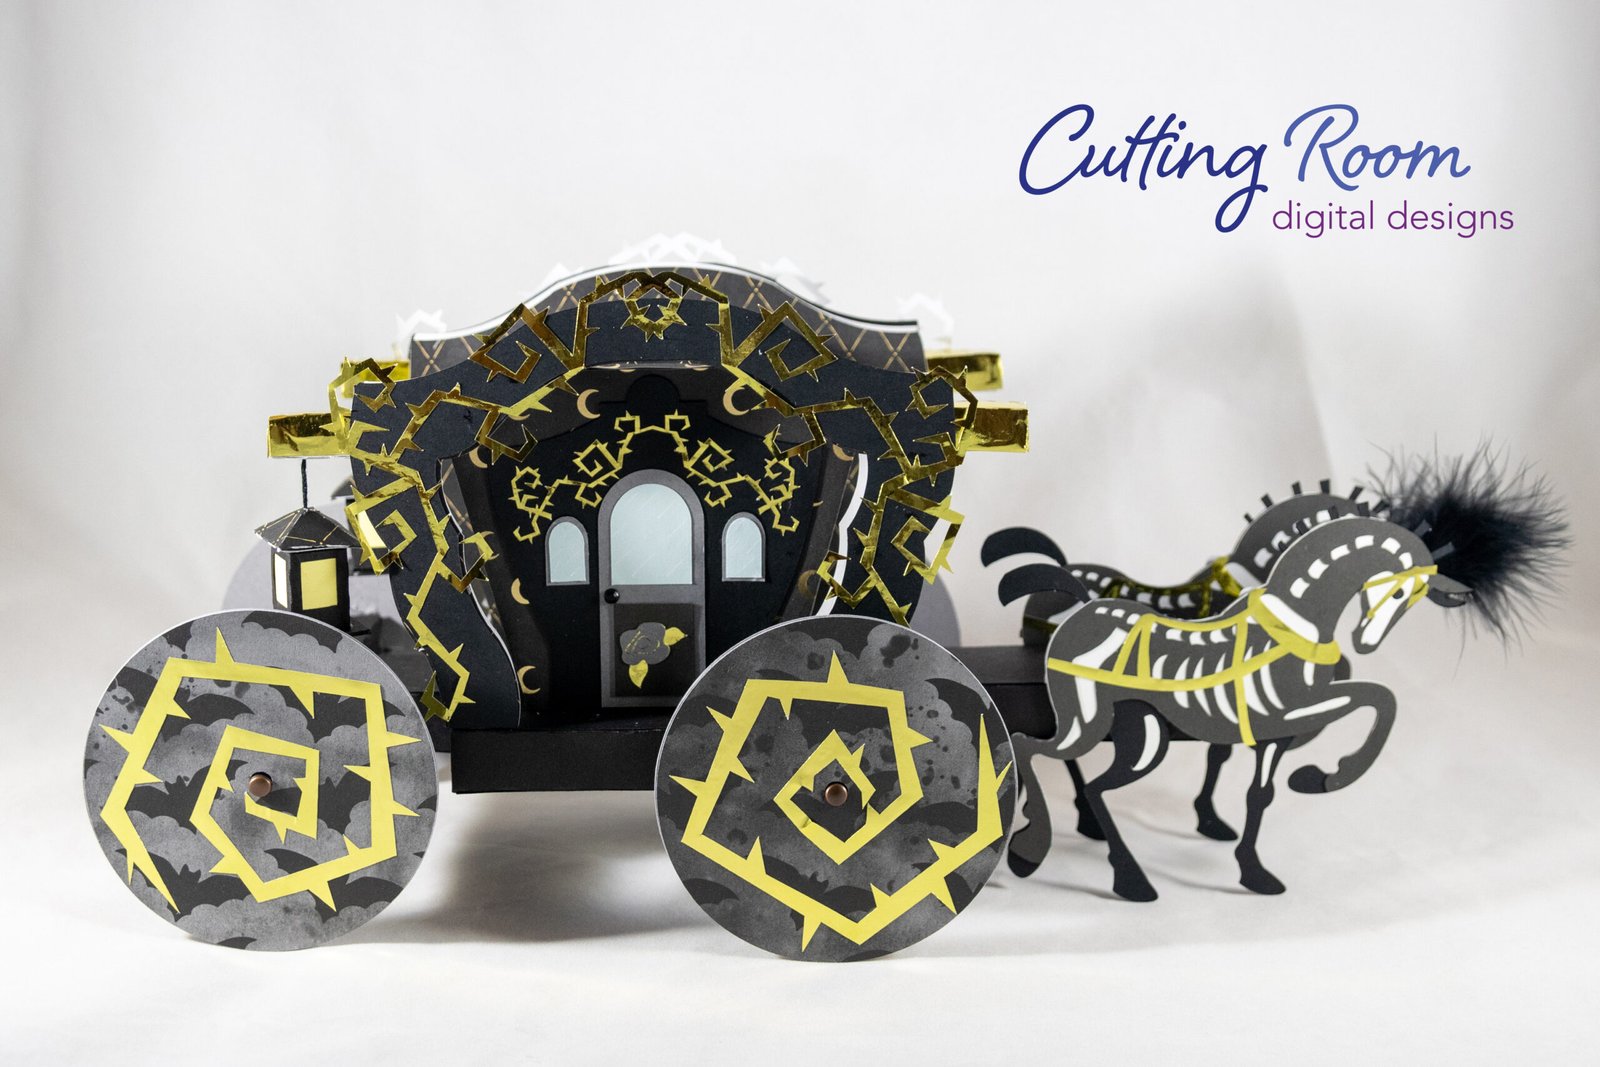
- Haunted Carriage Spooky Halloween Decoration – Digital Download SVG
- Recollections cardstock
- Gold Metallic Cardstock
- Brads
- Feathers For Crafting
- Art Glitter Glue
- Electric Cutting Machine: Cricut or Silhouette
***Note that this post contains affiliate links and we may receive compensation if you buy something using one of our links. ***
A Note About Our Carriage
This wagon is not terribly hard to put together, but it has a lot of pieces and does take a bit of time. There are a lot of pieces and step but no one step is super hard.
Building The Carriage Base
To assemble the base, collect the different pieces. The sides are made of 5 pieces that need to be glued together. They each have marks on the tabs to tell you the order they go in. I’ve marked them with white pen here to see them better.


Once you have them glued together into one long line, don’t connect the ends yet. Fold the tabs along the bottom in and attach to the large base panel. Start with the one that has a hole in it as shown and work your way around the shape. Be sure your first couple tabs are really well positioned as they set the tone for all the other ones to fit well or not. When you have worked your way around, glue the last couple tabs to the base and the final tab to close off the sides (connecting side 1 to side 5)


Once all the sides are in place, fold the tabs down so you can add glue to them then place the top panel on. We had to hold the pieces from the sides on as the glue dried. This helps ensure the sides stay nice and vertical. Once the glue is starting to set, place it on a flat surface and something flat and not too heavy on top. This will help ensure that your shape dries flat, without a warp or anything which can happen when making components. We used the same technique with the pieces for the arch as well and it really helps to form a clean line and stronger shape.
There is a third large panel that will be used later to cover all the exposed tabs. Hold off on attaching it for now. We chose to put the entire carriage together on it then place it on this base you’ve created.


Making The Arches
Next it’s time to make the arches. The arches are made of several pieces. You’ll need to make four identical half arches. These go together the same way as the carriage base. They are marked 1-3. Glue them together end to end in numerical order. Then start with the piece marked as 1. This has three sections, the first one goes on the left side of the vertical post, the short center piece, goes on the bottom, and continue working your way around the entire shape making sure to have a snug fit.
Once you have made your way around and completed the circuit, fold in the top tabs and glue the panel in place. We then placed it on a flat surface with something on top to make sure the final drying of the glue made it set flat. Then do the other three. This is the time consuming part but it’s worth it!


All of them will have a finished side and a side with the tabs exposed. It won’t matter in the end though since they will all be covered later. You will note though, that two of them have a hole at the back. We put string through and glued it in place. This is how the lantern will be held in place. When ready, pair up one with a string and one without.


Combining The Arches
When you’re ready to glue them together, place a bit of glue on the end as shown. Using something to help make sure they are level (we used an ink pad container) glue the two pieces together and apply pressure from the sides to press the two together. When you feel like it’s secure, place this under something like you did with the carriage base. Let them dry while you get the arch decorative panels ready.


Decorating The Carriage Arches
The arch has two decorative panels, one that gets the decorative thorn piece and one that can be left plain. The plain one will be placed on the arch so it goes on the inside, the decorated will go on the side that faces out. When the arches are ready to be decorated, start with the end caps. Pre-fold as shown, then glue the end square in place and glue down the tabs. Then the rest can be glued in place.


With these in place, the decorative arches can go on. Be sure to decorate the outside of each as it will be seen once on the carriage. The lanterns are intended to go in the back so that should help you orient your work.


Carriage Lantern Assembly
The one last thing to do to the arch before moving to the next step, is to add the top of the lantern to the arch. The lantern comes in a couple pieces. There are four squares that are stacked to make the base. The sides of the lantern that get folded in to make a square, panels for the windows of the lantern, and the roof. We took the roof and folded along all the fold lines. Glue the tabs to make a peak, there will be a small hole in the peak. Put the string through the hole and glue it at the length desired.
We chose to use our finger as a spacer so that each would be hanging equally. You can choose how much or little your lantern hangs. Once the string is securely glued, fold in the square on the side to close up the shape, making a pyramid


Now you can put together the rest of the lantern. Place the rectangle pieces inside the lantern as shown. We did yellow so they would look lit. Vellum would be a fun alternative as well of if you are way more crafty than us, figuring out how to get a battery powered light into the lantern would be awesome! Once these are in place you can fold up and make the cube that’s the lantern. Each lantern has four squares that are stacked and glued together to make a base.


At this point we chose not to attach our assembled lantern to it’s roof because it makes the arches bulky and we didn’t have a good place for them to be. You can attach them now if you want.
Assembling the Carriage Cab
You can set aside the arch and now work on the carriage cabin. It’s made of four pieces for the sides, one for the bottom, and one for the top. Assemble the sides as shown.


When these are all together, fold in the bottom tabs, add some glue, and place the bottom in.


With the bottom in, fold the tabs in on the top and glue the top center one to the roof. Then glue the opposite to center tab in place. Once this glue is set, glue one side down, then the other. Be sure to hold the sides in place so that they remain square with the roof. Once the roof is on, you can add the decorative panel.


Now you can assemble the decorative side panels and add them to the sides of the carriage.


The carriage box can now be set aside with the other assembled pieces.
Putting Together The Wheels
The wheels are made of a couple pieces. We set it to be three for each and used extra heavy cardstock (110lb instead of the usual 65lb) to give extra strength. We then went back and cut an extra wheel using the pretty decorative paper we’d picked out. Looking back, I wish I’d cut another set to put on the inside of the wheels. I’ll do that for sure when I make this file again. Once we glued and stacked them together, we added a brad to the center to fill the hole, then placed the circular thorn decoration.

Attaching The Arches
Now that all the pieces are made, it’s time to assemble them. First, put a bit of glue on the bottoms of one of the arches. We chose hot glue. Then place on the base for the carriage. Center them on the base, there might be a little bit that sticks over the edge but it’s fine. Be sure you have them so that the decorated panel is facing out and the lantern is away from the long tongue where the horses will later be attached.


Once you have the first in place, gently turn the base around and repeat.

Placing The Carriage Cab
With the arches in place, put some glue on the bottom of the carriage box and center it between the two arches. Be aware of the side you placed the door on so it’s on the side you prefer.

Finishing The Lanterns
Now that the carriage has been assembled on the base you can glue the lanterns on if you didn’t in the earlier arch assembly step.


Attaching The Wheels
To attach the wheels and be sure they were all put on square to each other, we found a couple books that we could stack but were narrow enough to allow all four wheels to e put on. Once we found the right sized books we added hot glue to the axels and firmly pressed the wheels into place.


Placing The Assembled Carriage On The Base
With the two pieces complete, add glue to the base with the wheels then place the decorated panel carefully ontop. You can gently apply pressure with your fingers or using a ruler to reach between the arch and the carriage box.

Carriages Need Horses!
The final step is to assemble and attach the horses. There is a cut piece in the file that makes a paper feather but we happened to have some left over black feather from a project a few years ago and were more than a little excited to finally get to use them again. There are two horses and they are double sided so ultimately four horses (two facing each way). Once they were all assembled, we glued our feather on the inside of one then glued the other horse in place to give us two double sided horses.

Once the horses are assembled decide where on the tongue you want them to be. We held them up and repositioned them a few times until we had a preferred location then took a pencil and made a tiny mark on the side of the tongue. Then we added hot glue (we were getting impatience at this point, regular glue would be fine) from that mark going forward then we firmly pressed our horse against the tongue.

Woohoo! You’re done!
Leave a Reply